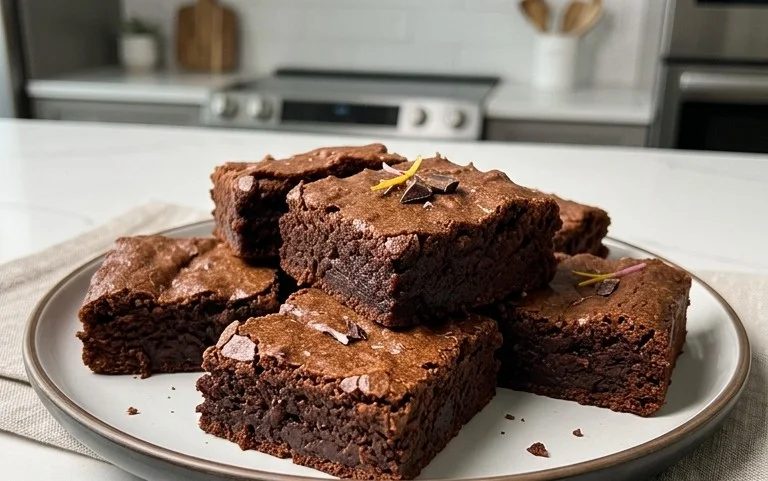
Salted Brownie Cookies-Decadent Chewy Treats
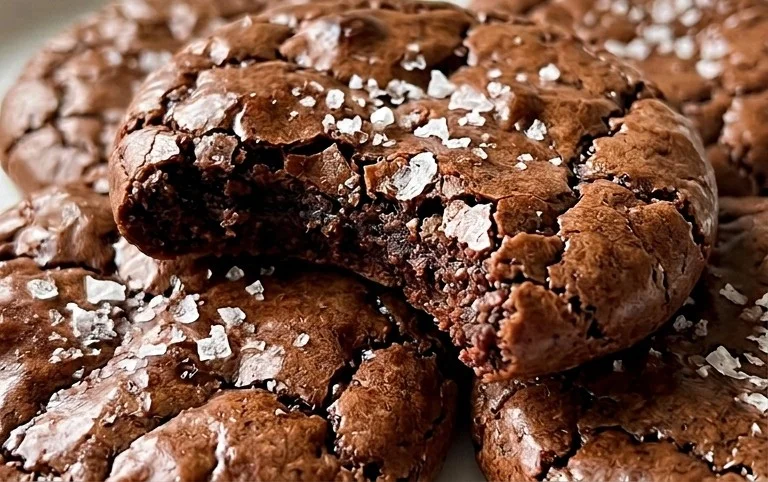
Salted Brownie Cookies are about to become your new obsession. Imagin extracte this: that deep, fudgy, intensely chocolatey flavor of your favorite brownie, all in the irresistible handheld format of a cookie, with a delicate salty finish that just elevates everything. It’s that perfect storm of sweet and salty, chewy and rich, that has us utterly captivated. Why do we love them so much? Because they deliver pure indulgence with every bite, offering a shortcut to brownie bliss without the commitment of a whole pan. What makes these particular Salted Brownie Cookies so special is their remarkable ability to achieve that coveted brownie texture – a slightly crisp edge giving way to a gooey, molten center – all while maintaining the delightful crispness of a perfectly baked cookie. Get ready to discover your new go-to treat.
Salted Brownie Cookies
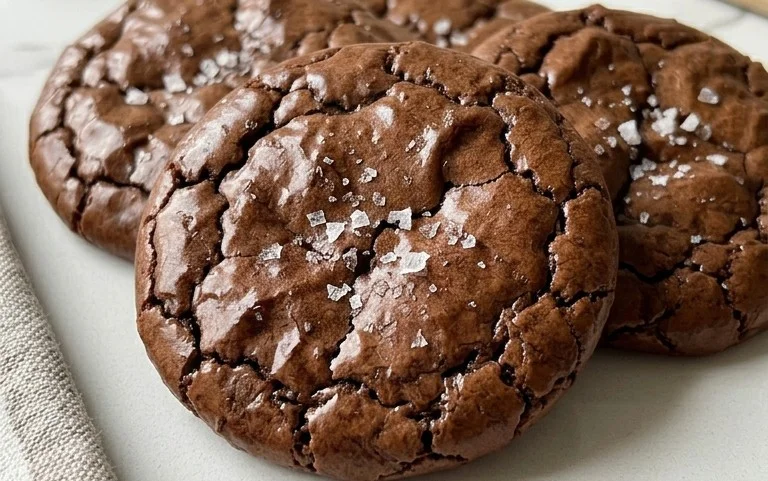
Get ready to experience pure decadence with these Salted Brownie Cookies! If you’re a lover of rich, fudgy brownies and the satisfying chew of a perfect cookie, then this recipe is your dream come true. These cookies pack all the intense chocolate flavor of a brownie into a delightful cookie form, with a perfectly chewy center and slightly crisp edges. The sprinkle of sea salt on top cuts through the sweetness beautifully, creating a flavor combination that’s utterly irresistible. I’ve perfected this recipe to ensure a deeply chocolatey, moist cookie every single time. They are surprisingly simple to make, and the results are truly spectacular. Prepare for your kitchen to smell heavenly!
Ingredients:
Instructions:
Prepare Your Dry Ingredients and Melt the Chocolate Base
In a medium bowl, whisk together the all-purpose flour, baking powder, and 1/8 teaspoon of salt. This ensures that your leavening agents and salt are evenly distributed throughout the dough, which is crucial for consistent texture and rise. Set this bowl aside. Now, let’s get to the star of the show: the chocolate! In a microwave-safe bowl, combine the 6 tablespoons of unsalted butter and 1 cup of semi-sweet chocolate chips. Microwave in 30-second intervals, stirring well after each interval, until the butter is melted and the chocolate is smooth and glossy. Be careful not to overheat; melting it slowly and stirring will prevent scorching. Once melted and smooth, stir in the 1/4 cup of unsweetened cocoa powder and the optional 1 teaspoon of espresso powder. The espresso powder, even if you don’t taste it directly, will deepen and intensify the chocolate flavor, making these cookies truly extraordinary. Stir until fully combined and you have a thick, luxurious chocolate mixture. Allow this chocolate mixture to cool slightly for about 5-10 minutes. This cooling period is important so it doesn’t cook the eggs when you add them.
Combine Wet Ingredients and Chocolate Mixture
In a large bowl, whisk together the granulated sugar, 2 large eggs (at room temperature, which helps them emulsify better), and the extra egg yolk (also at room temperature). Whisk vigorously until the mixture is well combined and slightly lighter in color. Then, add the 1 tablespoon of vegetable oil and 1 teaspoon of vanilla extract. The vegetable oil contributes to the chewy texture of the cookie. Whisk again until everything is fully incorporated. Now, pour the slightly cooled, melted chocolate mixture into the egg and sugar mixture. Stir with a spatula or whisk until everything is beautifully combined, creating a rich, dark, and glossy batter. This is where the brownie magic really starts to happen!
Incorporate Dry Ingredients
Gradually add the dry ingredients (the flour mixture you set aside earlier) to the wet ingredients. It’s best to add them in two or three additions, mixing with a spatula or wooden spoon after each addition until just combined. Be careful not to overmix at this stage. Overmixing can develop the gluten in the flour too much, leading to tougher cookies. We want a tender, chewy cookie, so mix until you no longer see streaks of flour. The dough will be thick and fudgy, very much like brownie batter.
Chill the Dough and Prepare for Baking
This step is crucial for achieving those wonderfully thick, fudgy cookies that don’t spread too much. Cover the bowl with plastic wrap and refrigerate the dough for at least 1 hour, or up to 2 days. Chilling the dough allows the fats to firm up, which controls spreading, and it also allows the flavors to meld together beautifully. When you’re ready to bake, preheat your oven to 350°F (175°C). Line baking sheets with parchment paper. This prevents sticking and makes for easy cleanup. Scoop rounded tablespoons of the chilled dough onto the prepared baking sheets, leaving about 2 inches between each cookie as they will spread slightly. If you want those extra-fudgy centers, you can slightly flatten the tops of the cookie dough balls with the palm of your hand or the bottom of a glass. For an even more intense chocolate experience, press a few extra semi-sweet chocolate chips onto the tops of the dough balls before baking.
Bake and Finish with Sea Salt
Bake for 10-12 minutes, or until the edges are set and slightly firm, but the centers still look soft and slightly underbaked. The cookies will continue to cook on the baking sheet as they cool. This is key to achieving that perfect chewy interior. Immediately after taking the cookies out of the oven, and while they are still hot, sprinkle them generously with sea salt flakes. The heat of the cookies will help the salt adhere. The contrast of the warm, gooey chocolate cookie with the little pops of salt is pure bliss. Let the cookies cool on the baking sheets for at least 5-10 minutes before transferring them to a wire rack to cool completely. This resting period allows them to set up properly. Enjoy these incredible Salted Brownie Cookies warm with a glass of milk, or let them cool completely for a more structured cookie. They store wonderfully in an airtight container at room temperature for up to 3 days.
Conclusion:
I truly hope you enjoyed diving into this recipe for Salted Brownie Cookies! These little delights are a fantastic compromise for any dessert craving. They offer the rich, fudgy intensity of a brownie with the delightful chegrape juicess and crisp edges of a perfect cookie, all elevated by that sprinkle of sea salt that cuts through the sweetness beautifully. They are incredibly versatile, making them a go-to for any occasion, from a casual afternoon treat to a more impressive dessert to share.
For serving, I love these Salted Brownie Cookies slightly warm, perhaps with a glass of cold milk or a scoop of vanilla bean ice cream for an ultimate indulgence. They are also wonderful at room temperature and travel exceptionally well, making them perfect for potlucks or as gifts. Feel free to experiment with variations! You could fold in some chopped nuts like walnuts or pecans for added crunch, or even a handful of chocolate chips for an extra chocolatey punch. A swirl of caramel sauce on top before baking would be divine! I really encourage you to give this recipe a try; I promise you won’t be disappointed by these incredibly satisfying Salted Brownie Cookies.
Frequently Asked Questions:
Can I make these cookies ahead of time?
Absolutely! These Salted Brownie Cookies actually benefit from being made a day in advance. The flavors meld beautifully, and they achieve an even chewier texture. Store them in an airtight container at room temperature for up to 3-4 days.
My cookies spread too much. What did I do wrong?
Several factors can contribute to cookies spreading too much. Ensure your butter wasn’t too soft or melted; it should be softened but still hold its shape. Also, avoid overmixing the dough once the flour is added. Chilling the dough for at least 30 minutes before baking can also significantly reduce spreading.
What kind of salt is best for the topping?
For the best flavor and aesthetic, a flaky sea salt like Maldon sea salt is ideal. Its large, irregular crystals provide a delightful crunch and a burst of salinity that perfectly complements the rich chocolate. Regular table salt can be used in a pinch, but use it very sparingly as it’s much finer and saltier.
Salted Brownie Cookies
Decadent brownie cookies with a chewy center and crisp edges, finished with a sprinkle of sea salt for a perfect sweet and salty balance.
Ingredients
-
1 cup All-Purpose Flour
-
1 tsp Baking Powder
-
1/8 tsp Salt
-
2 Large Eggs (room temperature)
-
1 Large Egg Yolk (room temperature)
-
1 cup Granulated Sugar
-
1 tbsp Vegetable Oil
-
1 tsp Vanilla Extract
-
6 tbsp Unsalted Butter
-
1 cup Semi-Sweet Chocolate Chips
-
1/4 cup Unsweetened Cocoa Powder
-
1 tsp Espresso Powder
-
Sea Salt Flakes
Instructions
-
Step 1
In a medium bowl, whisk together the all-purpose flour, baking powder, and 1/8 tsp salt. Set aside. -
Step 2
In a large bowl, whisk together the room temperature eggs, egg yolk, granulated sugar, vegetable oil, and vanilla extract until well combined and slightly thickened. -
Step 3
Melt the unsalted butter in a microwave-safe bowl. Stir in the semi-sweet chocolate chips and unsweetened cocoa powder. Microwave in 30-second intervals, stirring in between, until smooth and fully melted. Stir in the espresso powder if using. Let cool slightly. -
Step 4
Pour the melted chocolate mixture into the egg mixture and whisk until just combined. -
Step 5
Gradually add the dry ingredients to the wet ingredients, mixing until just combined. Do not overmix. -
Step 6
Chill the dough for at least 15 minutes. Preheat your oven to 350°F (175°C). Line baking sheets with parchment paper. -
Step 7
Scoop rounded tablespoons of dough onto the prepared baking sheets, leaving about 2 inches between cookies. Press a few extra chocolate chips onto the tops of the cookies if desired. -
Step 8
Bake for 10-12 minutes, or until the edges are set and the centers are still slightly soft. Sprinkle with sea salt flakes immediately after removing from the oven. -
Step 9
Let the cookies cool on the baking sheets for a few minutes before transferring them to a wire rack to cool completely.
Important Information
Nutrition Facts (Per Serving)
It is important to consider this information as approximate and not to use it as definitive health advice.
Allergy Information
Please check ingredients for potential allergens and consult a health professional if in doubt.