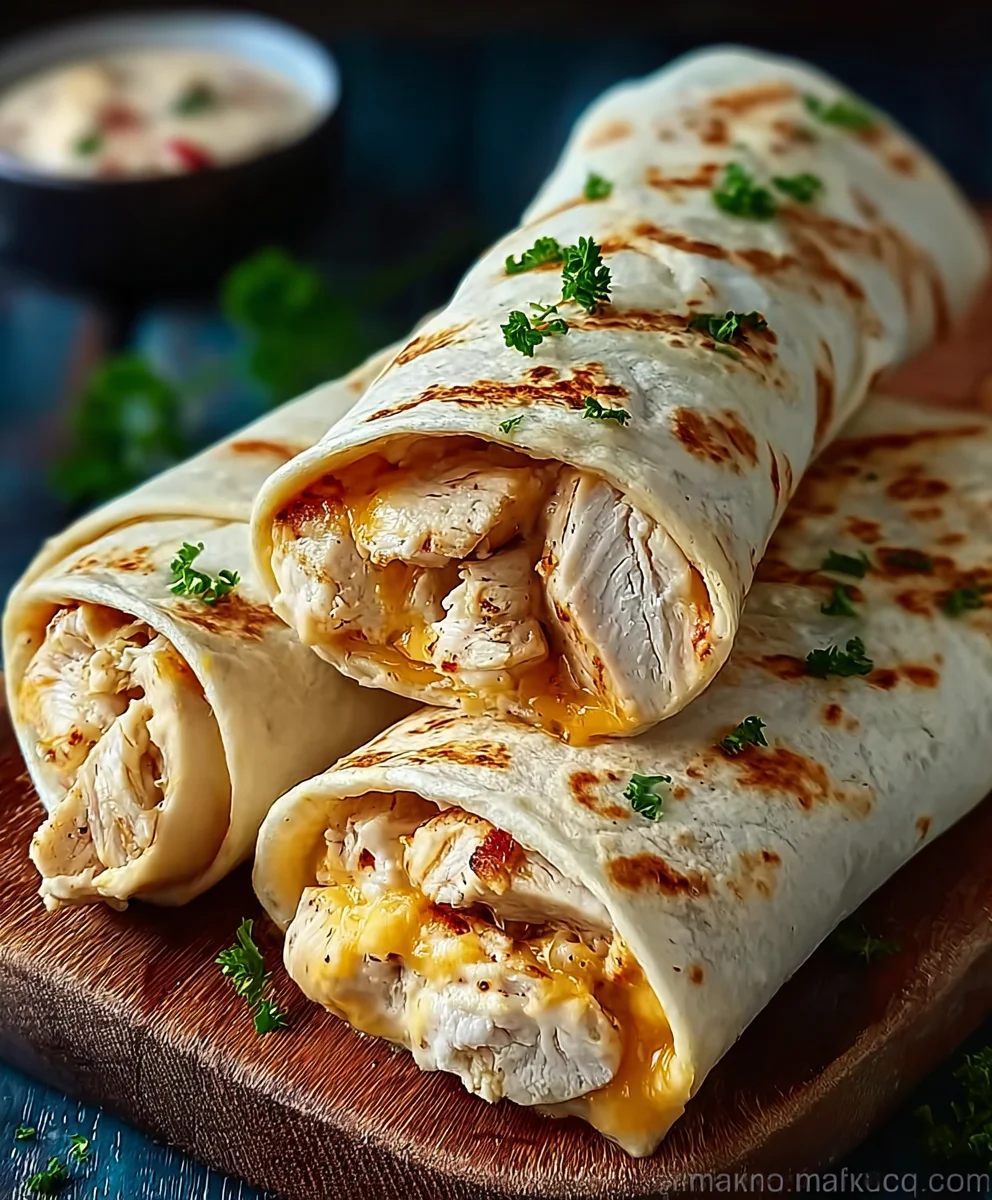
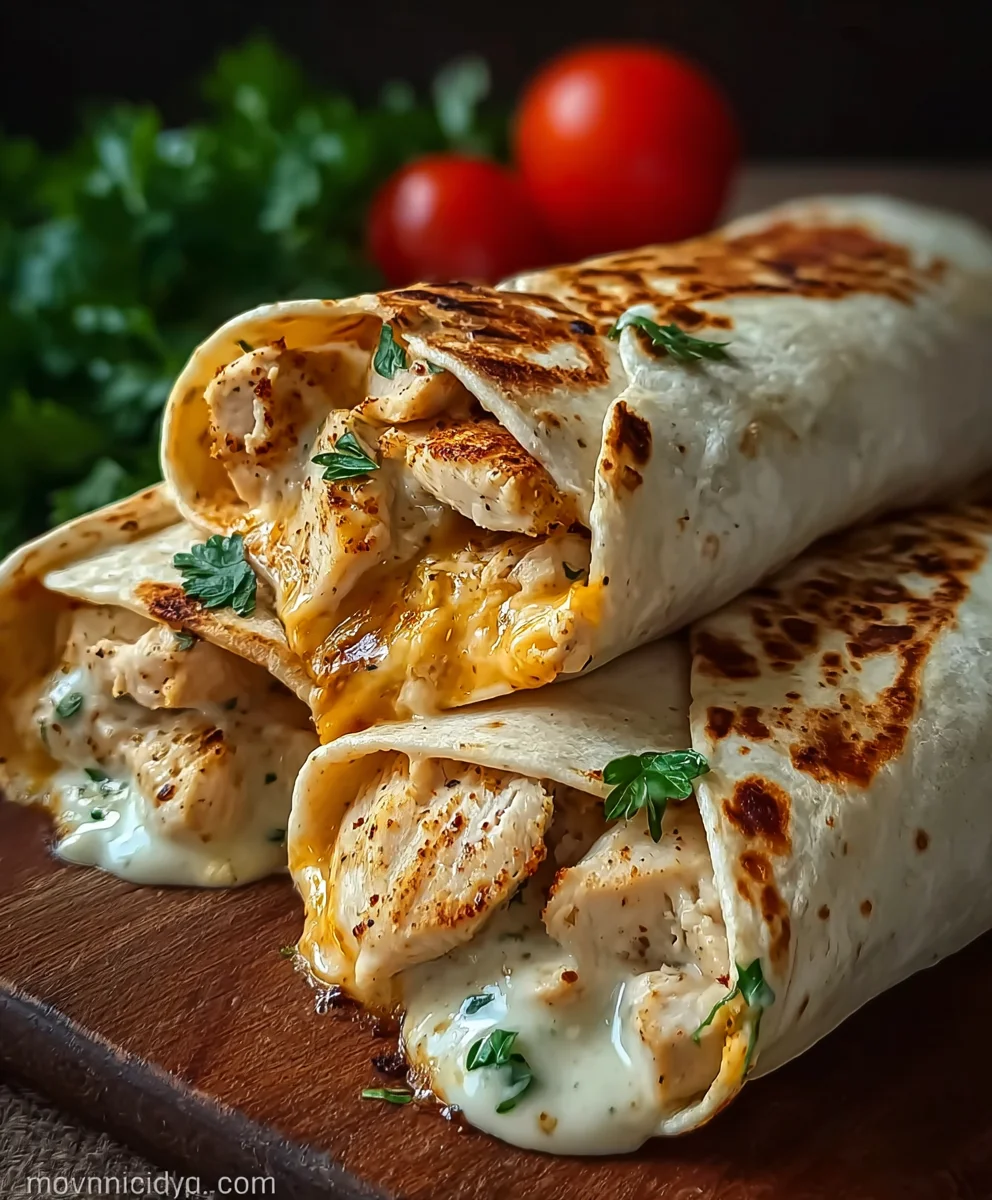
Cheesy Garlic Chicken Wraps – Easy & Delicious Recipe
Cheesy Chicken Garlic Wraps are more than just a meal; they’re a warm hug in edible form, a culinary masterpiece that brings smiles to faces and satisfaction to stomachs. Who doesn’t adore the comforting combination of tender chicken, melty cheese, and the irresistible aroma of garlic, all wrapped up in a soft tortilla? This dish is a universal favorite for a reason: it’s incredibly flavorful, remarkably easy to make, and utterly adaptable to your personal taste. What truly sets our Cheesy Chicken Garlic Wraps apart is the perfect balance of savory, creamy, and aromatic elements. We’re talking about succulent, seasoned chicken bathed in a garlicky, cheesy sauce, hugged by a perfectly grilled tortilla. It’s the ultimate weeknight wonder, a crowd-pleasing appetizer, or even a hearty lunch that will power you through your day. Get ready to fall in love with these delightful Cheesy Chicken Garlic Wraps!
Ingredients:
- 2 large chicken breasts, diced
- 4 large flour tortillas
- 1 tablespoon olive oil
- 2 teaspoons garlic powder
- 1 teaspoon onion powder
- 1 teaspoon paprika
- Salt and pepper, to taste
- 1 cup shredded cheddar cheese
- 1/2 cup shredded mozzarella cheese
- 1/2 cup creamy garlic sauce
- Fresh parsley, chopped
Preparing the Chicken
The foundation of our delicious Cheesy Chicken Garlic Wraps lies in perfectly seasoned and cooked chicken. To start, ensure your chicken breasts are cut into uniform, bite-sized pieces. This helps them cook evenly and makes for a pleasant eating experience in your wraps. In a medium bowl, toss the diced chicken with the olive oil, garlic powder, onion powder, paprika, and a generous pinch of salt and pepper. Make sure each piece of chicken is well coated with the seasoning mixture. The paprika will lend a lovely subtle smoky flavor and a hint of color, while the garlic and onion powders provide that essential savory depth that complements the creamy garlic sauce beautifully.
Cooking the Chicken
Now, let’s get that seasoned chicken cooked. Heat a large skillet or frying pan over medium-high heat. Once the pan is hot, add the seasoned chicken in a single layer. Avoid overcrowding the pan, as this can lead to steaming rather than searing, which we want to avoid. If necessary, cook the chicken in batches. Cook the chicken for about 6-8 minutes, stirring occasionally, until it’s golden brown and cooked through. You should see no pinkness in the center of the chicken pieces. Once cooked, remove the chicken from the skillet and set it aside on a plate. This resting period allows the juices to redistribute, ensuring tender and flavorful chicken.
Warming the Tortillas
Warm tortillas are crucial for pliable and enjoyable wraps; they’re less likely to tear when you’re filling and rolling them. You have a few options here. You can warm them one at a time in a dry skillet over medium heat for about 20-30 seconds per side until they become soft and flexible. Alternatively, you can wrap a stack of tortillas in a damp paper towel and microwave them for 30-60 seconds until warmed through. I find the skillet method gives them a nice subtle toastiness, but the microwave is quicker for a larger batch.
Assembling the Wraps
This is where all our delicious components come together. Lay one of the warmed tortillas flat on a clean surface. Spread a generous tablespoon or two of the creamy garlic sauce evenly over the surface of the tortilla, leaving a small border around the edge. This creamy garlic sauce is the star of the show, infusing every bite with its irresistible flavor. Next, evenly distribute a portion of the cooked chicken over the sauce. Don’t be shy with the chicken – we want substantial fillings!
Adding the Cheesy Goodness
Now for the “cheesy” part of our Cheesy Chicken Garlic Wraps! Sprinkle a good amount of the shredded cheddar cheese and mozzarella cheese over the chicken. The blend of cheddar and mozzarella offers a wonderful balance of sharp, nutty flavor from the cheddar and a delightful, melt-in-your-mouth stretchiness from the mozzarella. This combination ensures a wonderfully gooey and satisfying filling.
Folding and Finishing the Wraps
To complete the wraps, you’ll want to fold them carefully. Begin extract by folding in the two sides of the tortilla towards the center, overlapping them slightly. Then, starting from the bottom edge where the fillings are concentrated, tightly roll the tortilla upwards, encasing all the delicious chicken, cheese, and sauce. The warmth of the chicken and tortillas will help the cheese melt beautifully as you roll. For an extra touch of freshness and color, sprinkle some fresh chopped parsley over the top of the finished wrap, or mix it into the creamy garlic sauce before spreading. You can also lightly press the seam side down in a warm skillet for a moment to help seal the wrap if you wish, though it’s usually not necessary if rolled tightly. Serve immediately and enjoy your homemade Cheesy Chicken Garlic Wraps!
Conclusion:
And there you have it – a simple yet incredibly satisfying recipe for Cheesy Chicken Garlic Wraps! We’ve walked through each step to create these delightful parcels of flavor, perfect for a quick weeknight dinner, a hearty lunch, or even a crowd-pleasing appetizer. The combination of tender chicken, pungent garlic, and gooey melted cheese, all wrapped up in a soft tortilla, is a guaranteed winner. Don’t be afraid to get creative with your serving suggestions – these wraps are fantastic on their own, but they also pair wonderfully with a fresh side salad, some crunchy coleslaw, or a dipping sauce like ranch or sriracha mayo.
Feel free to explore variations! You could easily swap out the chicken for seasoned ground turkey or even crum extractbled firm tofu for a vegetarian option. Add some sautéed onions and bell peppers for extra color and crunch, or sprinkle in some chili flakes if you like a little heat. The possibilities are endless when it comes to personalizing your Cheesy Chicken Garlic Wraps. I encourage you to give this recipe a try, and I’m confident you’ll love the results as much as I do. Happy cooking!
Frequently Asked Questions:
Q: Can I make the Cheesy Chicken Garlic Wraps ahead of time?
A: While the chicken and garlic mixture can be prepared in advance and stored in the refrigerator for up to 2 days, it’s best to assemble and heat the wraps just before serving for optimal cheese meltiness and tortilla texture. Reheating can sometimes make tortillas a bit chewy.
Q: What kind of cheese works best for Cheesy Chicken Garlic Wraps?
A: A good melting cheese is key! Cheddar, Monterey Jack, a Mexican blend, or even Gruyère would be delicious. Feel free to experiment with your favorite blends to find the perfect cheesy pull.
Q: Can I freeze the Cheesy Chicken Garlic Wraps?
A: It’s generally not recommended to freeze the assembled wraps. The texture of the tortilla can suffer significantly after thawing, becoming soggy. It’s better to freeze the cooked chicken and garlic mixture separately if you want to prep ahead for future meals.
Cheesy Garlic Chicken Wraps – Easy & Delicious Recipe
Easy and delicious wraps filled with seasoned chicken, melted cheese, and creamy garlic sauce.
Ingredients
-
2 large chicken breasts, diced
-
4 large flour tortillas
-
1 tablespoon olive oil
-
2 teaspoons garlic powder
-
1 teaspoon onion powder
-
1 teaspoon paprika
-
Salt and pepper, to taste
-
1 cup shredded cheddar cheese
-
1/2 cup shredded mozzarella cheese
-
1/2 cup creamy garlic sauce
-
Fresh parsley, chopped
Instructions
-
Step 1
Dice chicken breasts into bite-sized pieces. In a bowl, toss chicken with olive oil, garlic powder, onion powder, paprika, salt, and pepper until well coated. -
Step 2
Heat a skillet over medium-high heat. Add seasoned chicken in a single layer and cook for 6-8 minutes, stirring occasionally, until golden brown and cooked through. Set aside. -
Step 3
Warm flour tortillas in a dry skillet for 20-30 seconds per side, or microwave them wrapped in a damp paper towel for 30-60 seconds until pliable. -
Step 4
Lay a warmed tortilla flat. Spread 1-2 tablespoons of creamy garlic sauce evenly over the surface, leaving a small border. -
Step 5
Distribute a portion of the cooked chicken over the sauce. Sprinkle a generous amount of shredded cheddar and mozzarella cheese over the chicken. -
Step 6
Fold in the sides of the tortilla towards the center. Tightly roll the tortilla upwards from the bottom, encasing the fillings. Sprinkle with fresh parsley and serve immediately.
Important Information
Nutrition Facts (Per Serving)
It is important to consider this information as approximate and not to use it as definitive health advice.
Allergy Information
Please check ingredients for potential allergens and consult a health professional if in doubt.