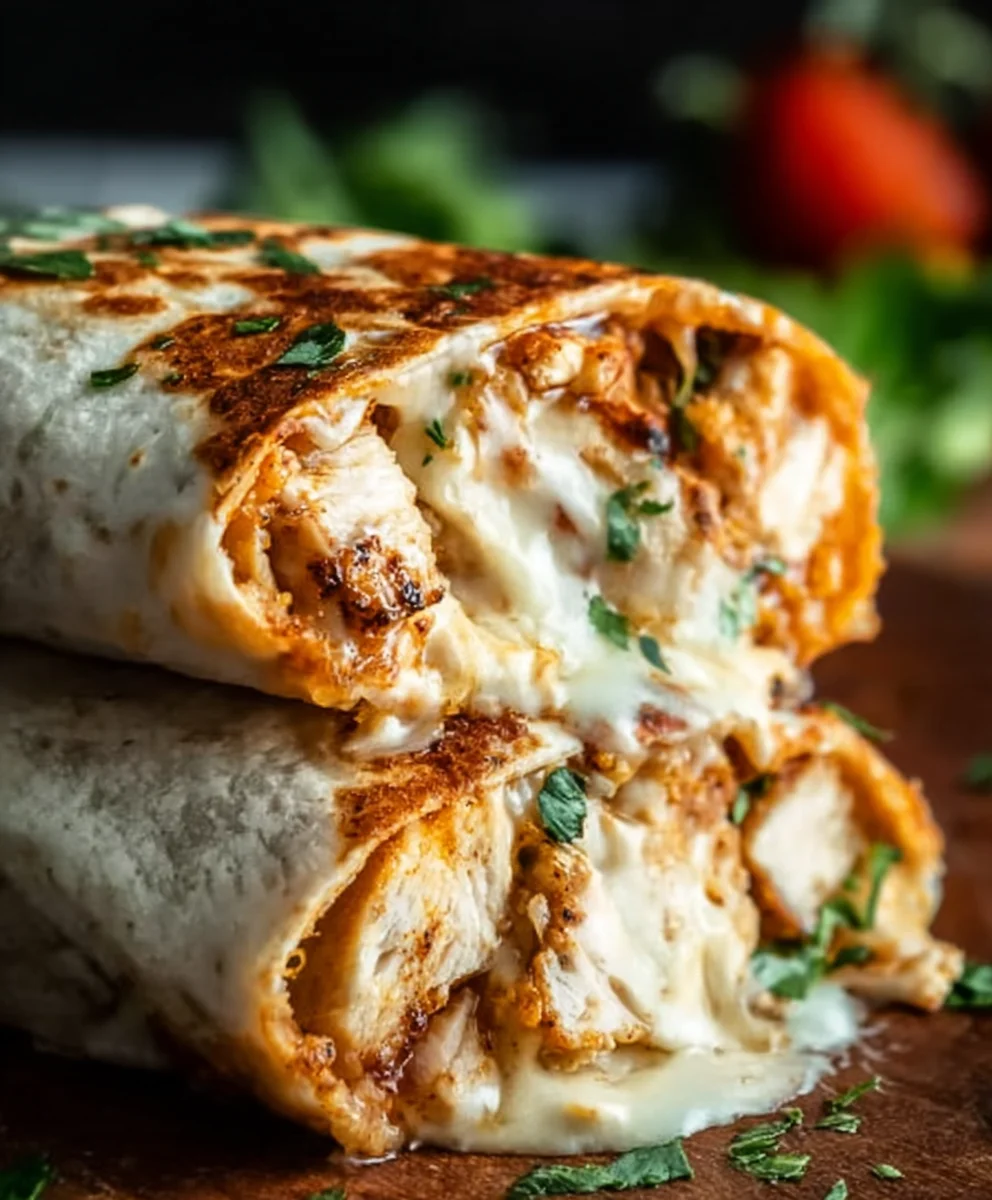
Cheesy Garlic Chicken Wraps – Easy & Delicious Dinner
Cheesy Garlic Chicken Wraps are the ultimate weeknight warrior, a dish that magically transforms humble ingredients into pure comfort food perfection. If you’ve ever found yourself staring into the abyss of your refrigerator after a long day, wondering what edible miracle you can whip up without resorting to takeout, these wraps are your answer. What makes them so incredibly beloved? It’s that irresistible combination of tender, garlicky chicken, melty, gooey cheese, all nestled inside a warm, pliable tortilla. This isn’t just dinner; it’s a hug in a wrap! The secret to their specialness lies in the simplicity and the flavor explosion. We’re talking about a savory, aromatic garlic sauce that coats every bite of chicken, creating a depth of flavor that’s both sophisticated and incredibly approachable. These Cheesy Garlic Chicken Wraps deliver maximum satisfaction with minimal fuss, making them an instant family favorite that you’ll want to make again and again.
Ingredients:
- 2 cups cooked chicken, shredded
- 1/2 cup garlic aioli
- 1 cup cheddar cheese, shredded
- 4 large tortillas
- Salt and pepper to taste
Preparing the Chicken Mixture
Step 1: Combine Chicken and Aioli
The foundation of our Cheesy Garlic Chicken Wraps is a flavorful chicken mixture. In a medium-sized bowl, I like to combine the shredded cooked chicken with the garlic aioli. Ensure your chicken is already cooked and cooled enough to handle. Shredding it finely will help it distribute evenly within the wrap and ensure every bite is packed with flavor. A fork is usually my go-to tool for shredding, but if you have pre-shredded chicken, even better! Now, spoon the creamy garlic aioli over the shredded chicken. The aioli acts as a binder, adding a rich, garlicky, and slightly tangy flavor that pairs beautifully with the chicken. Use a spoon or spatula to thoroughly mix the aioli into the chicken. You want to make sure every strand of chicken is coated in that delicious sauce. Don’t be shy with the aioli; it’s what makes these wraps so irresistibly moist and flavorful.
Step 2: Seasoning and Cheese Integration
Once the chicken and aioli are well combined, it’s time to bring in the cheese and seasonings. Sprinkle the shredded cheddar cheese over the chicken mixture. Cheddar cheese melts wonderfully and adds that essential cheesy pull and savory depth that makes these wraps so satisfying. Now, for the seasoning. Season generously with salt and freshly ground black pepper to taste. The amount of salt you need will depend on how salty your cooked chicken and aioli are, so start with a pinch of each and then taste. You can always add more, but you can’t take it away! Gently fold the cheese and seasonings into the chicken mixture. You’re aiming for a cohesive filling that’s evenly distributed with cheese and seasoned perfectly.
Assembling the Wraps
Step 3: Warming the Tortillas (Optional but Recommended)
To make our large tortillas more pliable and easier to wrap without tearing, I highly recommend warming them slightly. You can do this in a few ways. My favorite method is to warm them one at a time in a dry skillet over medium heat for about 30 seconds per side. This will soften them up nicely. Alternatively, you can wrap a stack of tortillas in a damp paper towel and microwave them for about 30-45 seconds, or carefully warm them over an open gas burner flame for a few seconds per side (be very cautious if using this method). A warm tortilla is crucial for preventing cracks and ensuring a neat wrap, which will make the entire eating experience much more enjoyable.
Step 4: Filling the Tortillas
Now for the exciting part – filling the tortillas! Lay one of your warmed large tortillas flat on a clean surface. Spoon about one-quarter of the cheesy chicken mixture onto the center of the tortilla. You want to distribute the filling evenly, but avoid overfilling, as this can make rolling difficult. Imagin extracte a line of filling slightly below the center of the tortilla. This positioning will make it easier to fold the sides in before rolling. Make sure you’re getting a good balance of chicken and cheese in each portion. If you like a little extra zing, this is also a good time to add a drizzle of your favorite hot sauce or a sprinkle of fresh chives if you happen to have some on hand, though it’s not part of the core recipe!
Step 5: Rolling the Cheesy Garlic Chicken Wraps
This step is all about technique to ensure your wraps stay together. Take the bottom edge of the tortilla (the edge closest to you) and fold it up and over the filling, tucking it in snugly. Next, fold in the sides of the tortilla towards the center, creating a neat envelope shape. Once the sides are folded in, tightly roll the tortilla away from you, keeping the filling contained. The key here is to roll firmly but not so tight that you tear the tortilla. If any filling tries to escape, just tuck it back in as you roll. Repeat this process with the remaining three tortillas and the rest of the chicken mixture. The warmth of the tortilla will help seal the edges slightly as you roll.
Finishing Touches
Step 6: Grilling or Pan-Frying the Wraps (Optional)
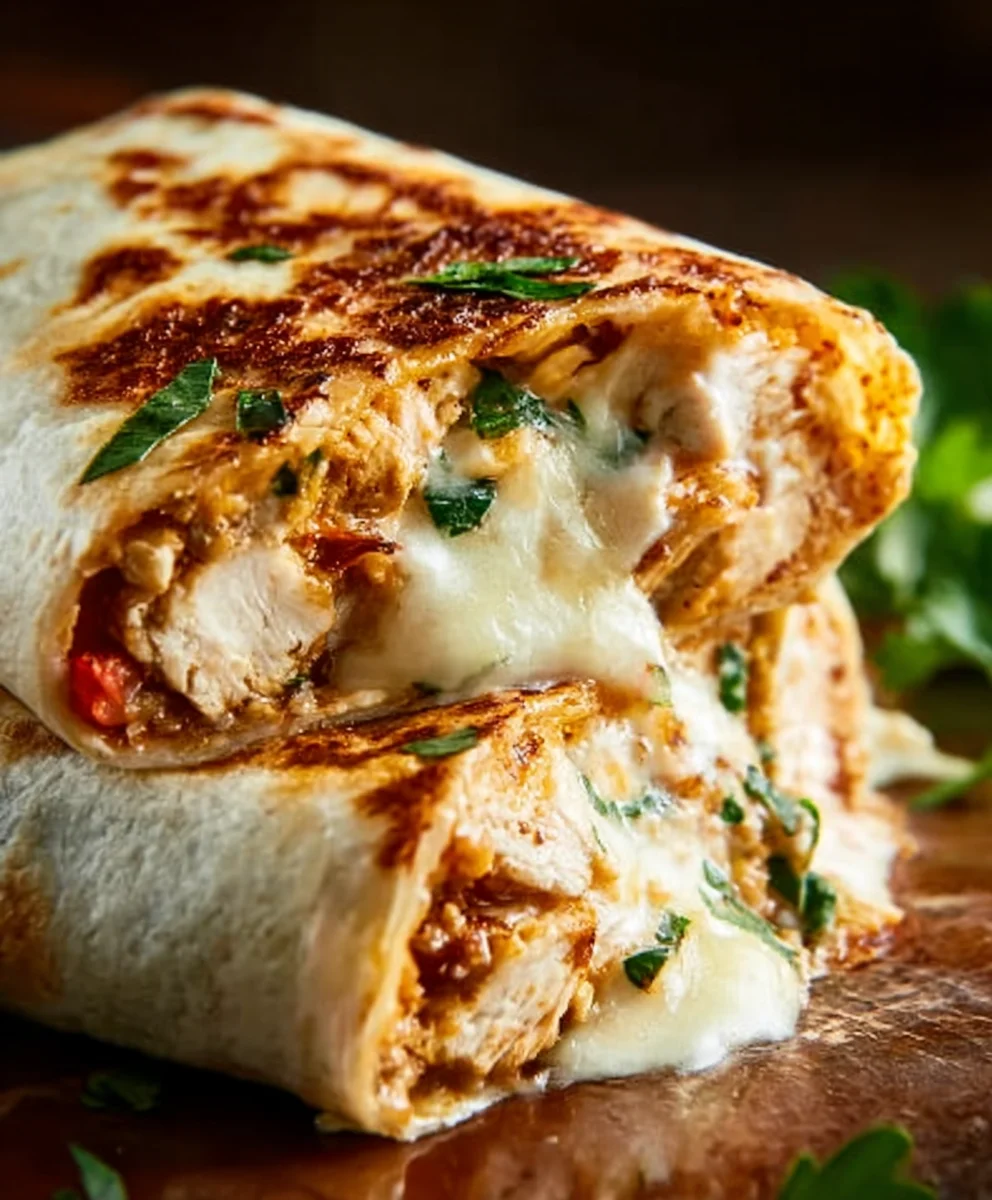
For an extra layer of deliciousness and a lovely crispy exterior, I often like to quickly grill or pan-fry the assembled wraps. You can lightly brush the outside of each rolled wrap with a tiny bit of olive oil or butter. Heat a skillet or griddle over medium heat. Place the wraps seam-side down first to help seal them. Cook for about 2-3 minutes per side, or until golden brown and slightly crispy. This step is completely optional, but it truly elevates the Cheesy Garlic Chicken Wraps from good to fantastic by adding texture and a beautiful golden hue. It also helps to melt the cheese further, creating those irresistible gooey pockets of flavor.
Conclusion:
There you have it! Your guide to creating the most delightful Cheesy Garlic Chicken Wraps. We’ve covered everything from prepping the succulent chicken to assembling these flavour-packed delights. The combination of tender, garlicky chicken, melted cheese, and fresh vegetables, all hugged by a warm tortilla, makes these wraps a true winner for any occasion. Whether you’re looking for a quick weeknight dinner, a satisfying lunch, or even a crowd-pleasing appetizer, these Cheesy Garlic Chicken Wraps deliver on taste and ease.
For serving suggestions, I love to pair these wraps with a crisp side salad tossed with a light vinaigrette, some crunchy sweet potato fries, or even a cup of hearty tomato soup. If you’re feeling adventurous, consider adding a dollop of sour cream or a drizzle of your favourite hot sauce for an extra kick. The beauty of this recipe lies in its versatility. Don’t hesitate to swap out the type of cheese, add different vegetables like bell peppers or spinach, or even use leftover roasted vegetables. Get creative and make these Cheesy Garlic Chicken Wraps your own!
Frequently Asked Questions:
Can I make the chicken ahead of time?
Absolutely! You can pre-cook and shred or dice the chicken up to two days in advance and store it in an airtight container in the refrigerator. This will make assembling the wraps even faster when you’re ready to eat.
What if I don’t have garlic powder? Can I use fresh garlic?
Yes, you can definitely use fresh garlic! For the same amount of garlic powder, you would typically use about 1-2 cloves of minced fresh garlic. Sauté the fresh garlic with the chicken as it cooks to release its flavour.
Are there any dairy-free options for these Cheesy Garlic Chicken Wraps?
While the “cheesy” aspect is key, you can adapt this recipe for dairy-free needs. Substitute the cheese with a good quality dairy-free shredded cheese alternative. You might also consider adding a creamy avocado spread or a dairy-free ranch dressing to enhance the moisture and flavour.
Cheesy Garlic Chicken Wraps
Easy and delicious chicken wraps filled with shredded chicken, creamy garlic aioli, and melted cheddar cheese, all wrapped in soft tortillas. A perfect quick dinner option.
Ingredients
-
2 cups cooked chicken, shredded
-
1/2 cup garlic aioli
-
1 cup cheddar cheese, shredded
-
4 large tortillas
-
Salt to taste
-
Pepper to taste
Instructions
-
Step 1
In a medium bowl, combine the shredded cooked chicken with the garlic aioli. Mix well until every strand of chicken is coated. -
Step 2
Sprinkle the shredded cheddar cheese and salt and pepper to taste over the chicken mixture. Gently fold to combine. -
Step 3
Warm the large tortillas by heating them in a dry skillet over medium heat for about 30 seconds per side, or microwave a stack wrapped in a damp paper towel for 30-45 seconds. -
Step 4
Lay a warmed tortilla flat. Spoon about one-quarter of the cheesy chicken mixture onto the center, slightly below the middle. -
Step 5
Fold the bottom edge of the tortilla up and over the filling, then fold in the sides. Tightly roll the tortilla away from you. -
Step 6
Optional: Lightly brush the outside of the wraps with olive oil or butter. Grill or pan-fry in a skillet over medium heat for 2-3 minutes per side until golden brown and crispy.
Important Information
Nutrition Facts (Per Serving)
It is important to consider this information as approximate and not to use it as definitive health advice.
Allergy Information
Please check ingredients for potential allergens and consult a health professional if in doubt.