Hardening Sugar Cookie Icing – Easy & Delicious Recipe
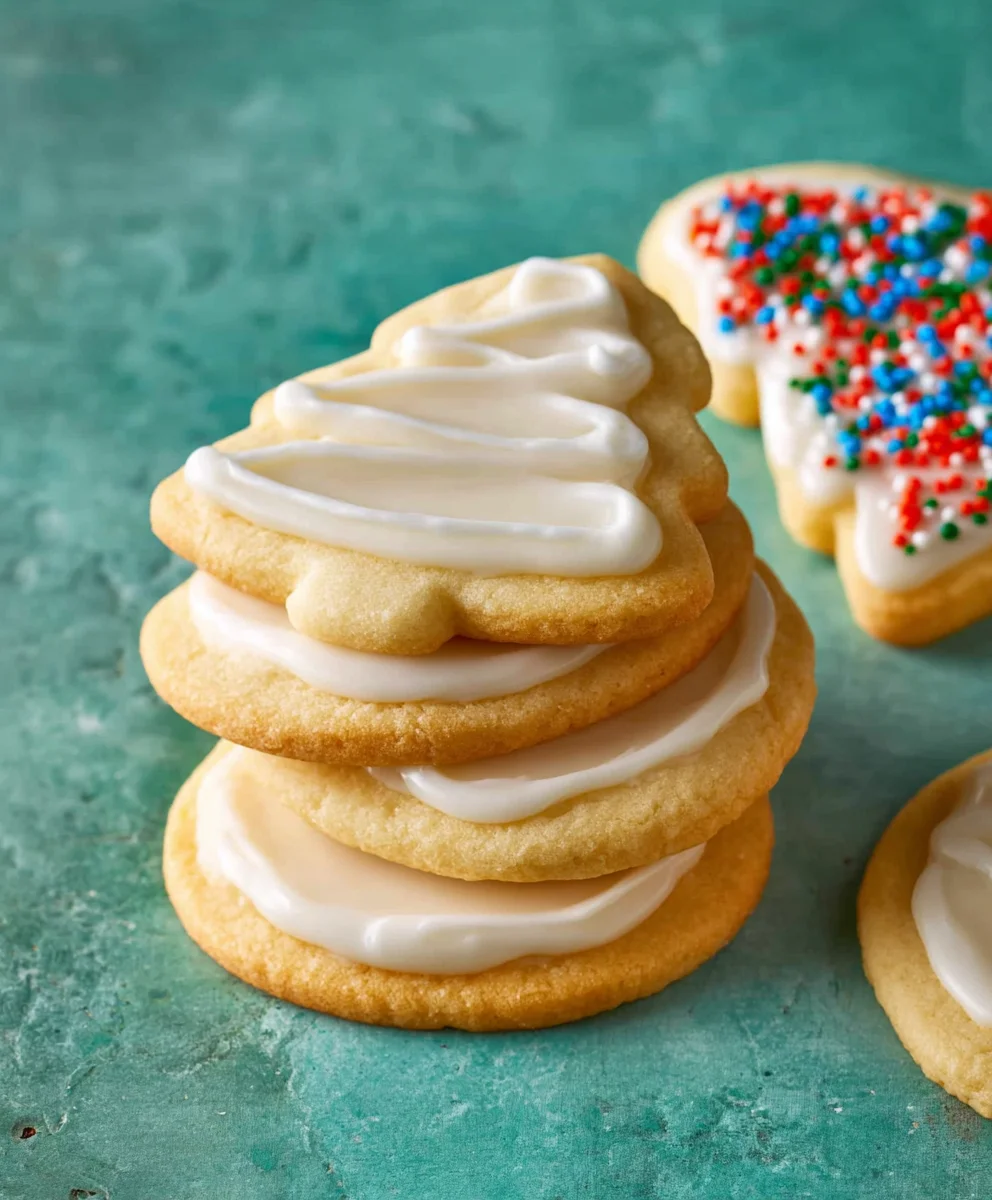
Sugar cookie icing that hardens is the secret weapon every baker needs in their arsenal. Imagin extracte biting into a perfectly baked sugar cookie, its delicate sweetness complemented by a smooth, vibrant layer of icing that snaps just right. That’s the magic we’re talking about! People absolutely adore sugar cookies, not just for their comforting, nostalgic flavor but also for their incredible versatility. They’re the canvas for countless celebrations, from festive holidays to cheerful birthdays. But what truly elevates a good sugar cookie to an unforgettable one is an icing that doesn’t just sit there – it transforms. This particular sugar cookie icing that hardens provides that impeccable, professional finish, giving your baked goods a beautiful sheen and a satisfying texture that will have everyone asking for the recipe. It’s the perfect balance of sweet flavor and durable structure, ensuring your creations look as stunning as they taste, and hold up beautifully for gifting or display.
Ingredients:
- 2 cups powdered sugar
- 1 and 1/2 tablespoons light corn syrup
- 1/2 teaspoon pure vanilla extract
- 1 and 1/2 tablespoons cold milk or water
- Gel food coloring (various colors of your choice)
Preparing the Base Icing
This sugar cookie icing that hardens is wonderfully simple to make and delivers a beautifully smooth, professional finish to your baked goods. The key to its ability to harden is the corn syrup, which provides structure and shine, while the powdered sugar forms the bulk. We’ll start by getting our dry ingredients ready.
Step 1: Sift and Measure
In a medium-sized mixing bowl, measure out your 2 cups of powdered sugar. It’s a good idea to sift the powdered sugar before measuring, or at least once it’s in the bowl. Sifting helps to remove any lumps that might be present, ensuring a silky-smooth icing consistency. If you don’t have a sifter, you can whisk the powdered sugar vigorously to break up clumps. Once sifted, gently level off the top of the measuring cup.
Step 2: Combine Wet Ingredients
In a separate, smaller bowl or liquid measuring cup, combine the wet ingredients. This includes your 1 and 1/2 tablespoons of light corn syrup, 1/2 teaspoon of pure vanilla extract for that classic, sweet flavor, and 1 and 1/2 tablespoons of cold milk or water. Using cold liquid helps to prevent the powdered sugar from dissolving too quickly, which can sometimes lead to a runnier icing than desired. Whisk these ingredients together until they are well incorporated.
Mixing and Achieving the Right Consistency
Now comes the fun part – bringin extractg it all together! The goal here is to create a smooth, thick icing that’s perfect for decorating. It should be thick enough to hold its shape on a cookie but fluid enough to spread without leaving streaks.
Step 3: Gradually Incorporate Liquidsgin extract4>
Begin by pouring about half of the wet ingredient mixture into the bowl with the sifted powdered sugar. Using a whisk or a spatula, start mixing. You’ll notice it will be quite thick and clumpy at first. Gradually add the remaining wet ingredients, mixing continuously. Continue to stir until you achieve a thick, smooth consistency. If the icing seems too thick, you can add another teaspoon of milk or water, a tiny bit at a time, until it reaches your desired flow. Conversely, if it’s too thin, add a tablespoon more powdered sugar. The perfect consistency will be like thick toothpaste, where a ribbon of icing dripped from your whisk or spatula will hold its shape for a few seconds before slowly melting back into the rest of the icing.
Step 4: Tinting the Icing
This is where your creativity can really shine! If you want a simple white icing, you can skip this step. However, for beautifully decorated sugar cookies, coloring is essential. Divide your icing into smaller bowls, depending on how many colors you plan to use. Add your gel food coloring a drop at a time to each bowl. Gel colors are highly concentrated, so you only need a tiny amount to achieve vibrant hues. Stir each bowl thoroughly until the color is evenly distributed and you have reached your desired shade. Remember that gel colors can deepen slightly as they sit.
Decorating and Setting
Once your icing is the perfect consistency and color, it’s time to decorate! This icing is versatile; you can use it for outlining, flooding, or intricate designs.
Step 5: Decorate and Let Harden
Using piping bags with various tips, or even a simple zip-top bag with a cornergin extractipped off, begin decorating your cooled sugar cookies. For outlining, use a slightly thicker consistency. For flooding, you might want to thin the icing slightly with a few more drops of milk or water. Once decorated, allow the cookies to sit at room temperature for at least 30 minutes, or until the icing feels firm to the touch. For a completely hardened finish that can be stacked or packaged, allow them to air dry for several hours, or even overnight, in a single layer on a wire rack. The corn syrup in the mixture will help the icing to set into a hard, glossy shell. Avoid refrigerating the cookies while the icing is still wet, as condensation can make the icing sticky.

Conclusion:
And there you have it – the perfect recipe for Sugar cookie icing that hardens! This versatile icing is your secret weapon for creating beautifully decorated cookies that not only look stunning but also withstand stacking and shipping. We’ve covered everything from achieving the ideal consistency for crisp edges to ensuring a smooth, professional finish. Remember, the key to success with Sugar cookie icing that hardens lies in patience and precise measurements. Allow your cookies ample drying time, and you’ll be rewarded with edible art!
For serving, these decorated cookies are fantastic on their own as a sweet treat. They also make wonderful additions to cookie platters, party favors, or as thoughtful gifts. Don’t be afraid to get creative with your decorating! Consider using food coloring to match themes, adding edible glitter for extra sparkle, or even incorporating sprinkles before the icing fully sets. Experimenting with different piping tips will allow for intricate designs and varied textures.
This recipe for Sugar cookie icing that hardens is incredibly forgiving, so don’t be discouraged if your first attempt isn’t picture-perfect. Practice makes perfect, and each batch will bring you closer to mastering the art of cookie decorating. Now go forth and create something delicious!
FAQs about Sugar cookie icing that hardens:
How long does Sugar cookie icing that hardens typically take to dry completely?
The drying time for Sugar cookie icing that hardens can vary depending on several factors, including humidity, the thickness of the icing application, and air circulation. However, for a fully hardened finish that is safe to stack or package, it typically takes anywhere from 8 to 24 hours. For thinner applications or in very dry conditions, it might be ready sooner, but it’s always best to err on the side of caution to avoid smudgin extractg.
Can I make Sugar cookie icing that hardens in advance?
Yes, you can absolutely make Sugar cookie icing that hardens in advance! Once prepared, it can be stored in an airtight container at room temperature for up to 2-3 days. Stir it thoroughly before using, as some separation might occur. If the icing becomes too thick, you can thin it slightly with a teaspoon or two of water or milk until you reach the desired consistency.
What are some common issues when making Sugar cookie icing that hardens, and how can I fix them?
A common issue is the icing being too thin, resulting in a runny consistency that spreads too much and doesn’t form crisp lines. To fix this, gradually add more powdered sugar, a tablespoon at a time, until the desired thickness is achieved. Conversely, if the icing is too thick and difficult to pipe, you can thin it down with a very small amount of liquid – start with half a teaspoon of water or milk and stir well before adding more, if needed. Another potential problem is the icing not hardening properly; this is often due to using too much liquid or not enough powdered sugar. Ensure you’re following the recipe proportions closely and allow ample drying time.
Hardening Sugar Cookie Icing
An easy and delicious recipe for sugar cookie icing that hardens to a smooth, professional finish. Perfect for decorating your baked goods.
Ingredients
-
2 cups powdered sugar
-
1 and 1/2 tablespoons light corn syrup
-
1/2 teaspoon pure vanilla extract
-
1 and 1/2 tablespoons cold milk or water
-
Gel food coloring (various colors of your choice)
Instructions
-
Step 1
In a medium-sized mixing bowl, sift 2 cups of powdered sugar to remove any lumps, ensuring a silky-smooth consistency. Whisk vigorously if you don’t have a sifter. -
Step 2
In a separate small bowl, combine 1 and 1/2 tablespoons of light corn syrup, 1/2 teaspoon of pure vanilla extract, and 1 and 1/2 tablespoons of cold milk or water. Whisk until well incorporated. -
Step 3
Gradually pour about half of the wet ingredient mixture into the bowl with the powdered sugar. Mix with a whisk or spatula. Continue adding the remaining wet ingredients while mixing until a thick, smooth consistency is achieved. Add more liquid a teaspoon at a time if too thick, or more powdered sugar a tablespoon at a time if too thin. -
Step 4
Divide the icing into smaller bowls for coloring, if desired. Add gel food coloring a drop at a time to each bowl and stir until evenly distributed and the desired shade is reached. -
Step 5
Decorate cooled sugar cookies using piping bags or a zip-top bag. For outlining, use a slightly thicker consistency; for flooding, thin with a few more drops of liquid. Allow decorated cookies to sit at room temperature for at least 30 minutes until firm, or air dry for several hours or overnight for a completely hardened finish.
Important Information
Nutrition Facts (Per Serving)
It is important to consider this information as approximate and not to use it as definitive health advice.
Allergy Information
Please check ingredients for potential allergens and consult a health professional if in doubt.