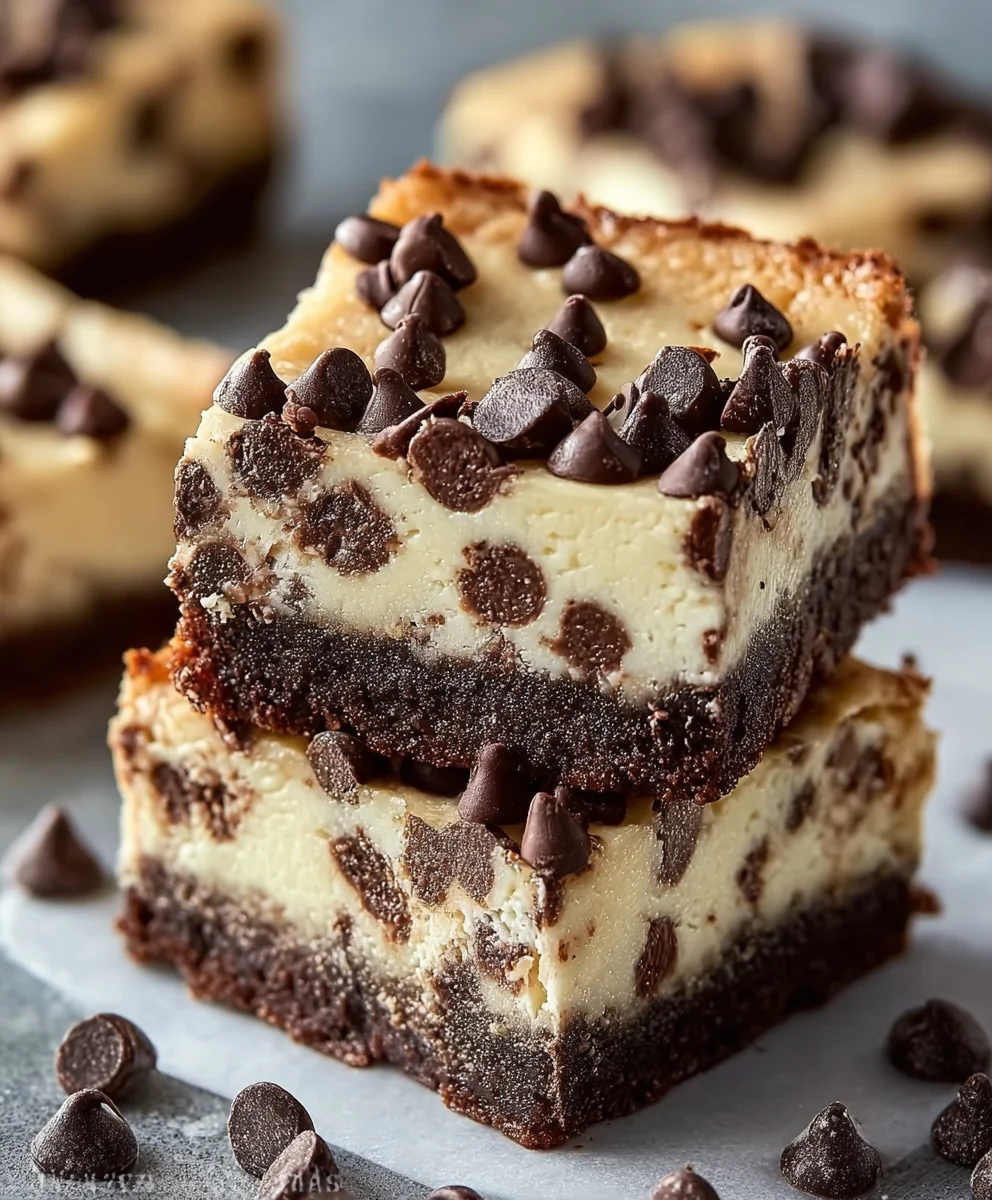
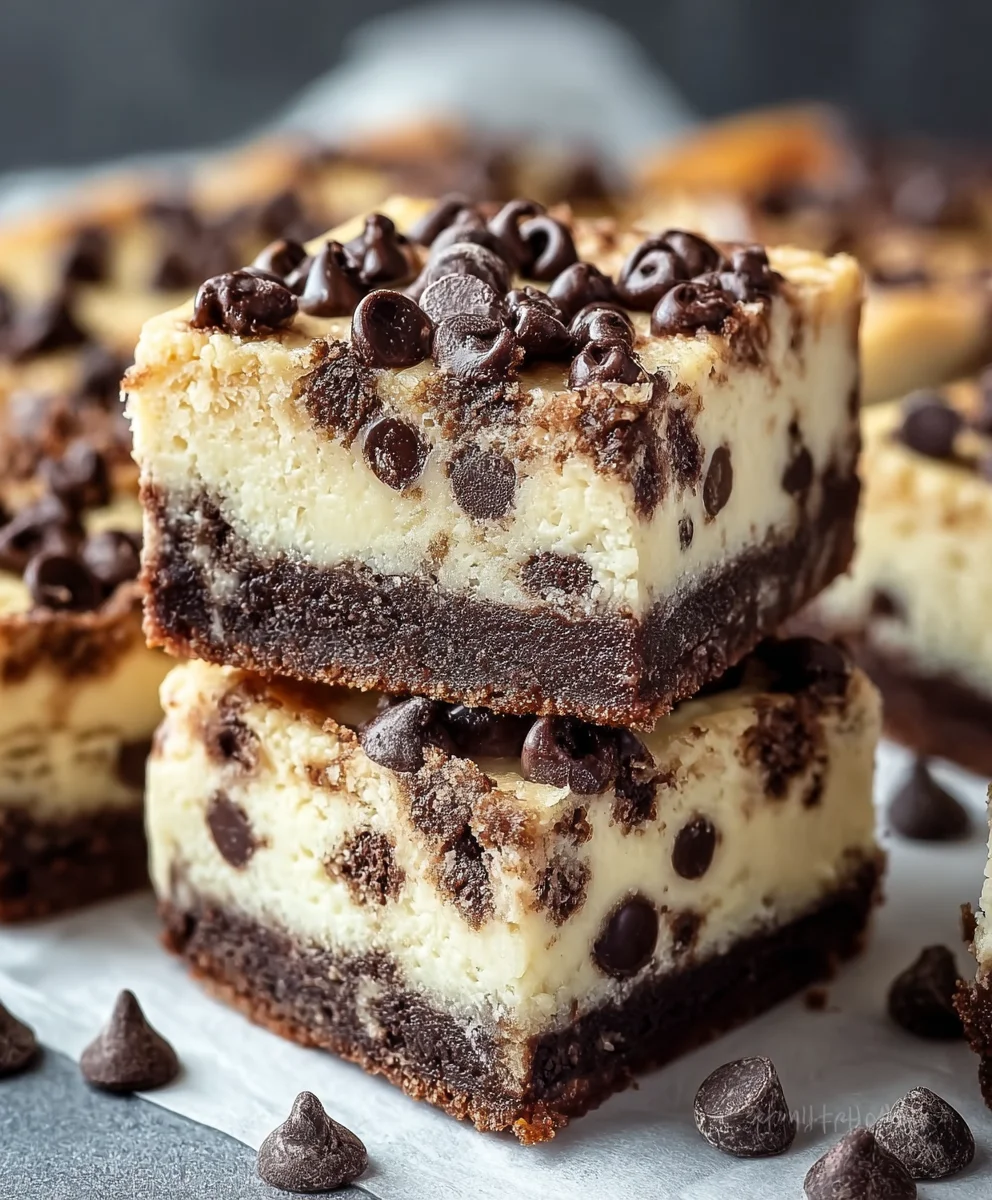
Decadent Chocolate Chip Cheesecake Bars-Easy Recipe
Chocolate Chip Cheesecake Bars are more than just a dessert; they’re a symphony of creamy, rich indulgence and sweet, gooey chocolate, all nestled within a delightful bar form. There’s a universal joy that washes over us when we encounter that perfect bite – the smooth, tangy cheesecake melting into the pockets of warm, molten chocolate, all supported by a buttery, crum extractbly crust. What makes these Chocolate Chip Cheesecake Bars so utterly irresistible? It’s the masterful balance of textures and flavors. The classic comfort of a cheesecake is elevated by the dynamic duo of chocolate chips, transforming it from a sit-down affair into a perfectly portable, utterly craveable treat. Whether you’re baking for a special occasion or simply seeking an afternoon pick-me-up, these bars promise a moment of pure, unadulterated happiness that will leave everyone beggin extractg for more.
Ingredients:
- 40 oz refrigerated chocolate chip cookie dough
- 16 oz cream cheese, softened to room temperature
- 1 large egg, at room temperature
- ¼ cup granulated sugar
- ½ tsp vanilla extract
- 1 tsp lemon juice (optional, but highly recommended for brightness)
Preparing Your Chocolate Chip Cheesecake Bars
This recipe is designed to be straightforward, bringin extractg together the comforting familiarity of chocolate chip cookies with the rich indulgence of cheesecake. The key to success lies in ensuring your cream cheese and egg are at room temperature; this allows them to incorporate smoothly, preventing lumps and creating a wonderfully creamy filling.
Step 1: Preheat Your Oven and Prepare the Pan
Befogin extractwe begin mixing, it’s crucial to get your oven ready. Preheat it to 350 degrees Fahrenheit (175 degrees Celsius). This moderate temperature ensures the cookie dough base bakes evenly without burning and the cheesecake filling sets up beautifully without cracking. Next, prepare your baking pan. For these bars, a 9×13 inch baking pan is ideal. Line it with parchment paper, leaving an overhang on two opposite sides. This overhang acts as “handles” to easily lift the finished bars out of the pan once they’ve cooled, making cutting and serving a breeze. If you don’t have parchment paper, you can lightly grease the pan with butter or cooking spray, but parchment is highly recommended for the cleanest release.
Step 2: Creating the Cookie Dough Base
Now, let’s work with that delicious chocolate chip cookie dough. You’ll need to divide the 40 ounces of refrigerated cookie dough. Reserve about one-third of the dough for the topping later. Take the remaining two-thirds of the cookie dough and press it evenly into the bottom of your prepared 9×13 inch baking pan. You can use your hands for this, but a flat-bottomed glass or the bottom of a measuring cup can help you achieve a uniform layer. Ensure there are no significant gaps or thick spots. This forms the foundation of our bars, providing a chewy, chocolatey contrast to the creamy cheesecake layer.
Step 3: Crafting the Creamy Cheesecake Filling
This is where the magic of cheesecake happens! In a medium-sized bowl, combine the 16 ounces of softened cream cheese with the ¼ cup of granulated sugar. Using an electric mixer (handheld or stand mixer) on medium speed, beat these two ingredients together until they are completely smooth and creamy. Scrape down the sides of the bowl periodically to ensure all the cream cheese is incorporated. Next, add the 1 large egg and the ½ teaspoon of vanilla extract. Continue to beat on medium speed until just combined. Be careful not to overmix at this stage, as it can introduce too much air, potentially leading to a cracked cheesecake. Finally, stir in the optional 1 teaspoon of lemon juice. The lemon juice adds a subtle tang that balances the richness of the cream cheese and enhances the overall flavor profile without making the bars taste distinctly lemony.
Step 4: Assembling and Topping the Bars
With your cookie dough base pressed and your cheesecake filling smooth and ready, it’s time to assemble. Gently pour the cheesecake filling evenly over the cookie dough base in the baking pan. Use a spatula to spread it out so it covers the entire surface of the cookie dough. Now, take the reserved one-third of the chocolate chip cookie dough. You can do this in a couple of ways: either crum extractble small pieces of the dough evenly over the cheesecake layer, or, if you prefer a more structured look, you can flatten small portions of the dough and place them strategically on top. Aim for a good distribution of cookie dough pieces so that each bite of your bars will have that delightful chocolate chip cookie element.
Step 5: Baking and Cooling for Perfect Texture
Carefully place the assembled pan into your preheated 350-degree Fahrenheit oven. Bake for approximately 30 to 40 minutes. You’ll know the bars are done when the edges of the cheesecake filling are set and slightly puffed, and the cookie dough topping is golden brown. The center might still appear slightly soft, but it will continue to set as it cools. Once baked, remove the pan from the oven and let the bars cool completely on a wire rack. This cooling process is essential for the cheesecake to firm up properly. Resist the urge to cut into them too soon! After they have cooled to room temperature, transfer the pan to the refrigerator and chill for at least 2 to 3 hours, or preferably overnight. Chilling will ensure the bars are firm enough to cut cleanly and will allow the flavors to meld beautifully. Once thoroughly chilled, use the parchment paper overhangs to lift the entire slab out of the pan and place it on a cutting board. Cut into squares or bars of your desired size.
Conclusion:
And there you have it – your guide to creating the most divine Chocolate Chip Cheesecake Bars! We’ve walked through each step, from the buttery grabeef ham cracker crust to the luxuriously smooth, chocolate chip-studded cheesecake filling. These bars are the perfect marriage of classic cheesecake and beloved chocolate chip cookies, offering a delightful textural contrast and an explosion of flavor with every bite. I truly hope you enjoy making and, more importantly, devouring these irresistible treats as much as I do!
These Chocolate Chip Cheesecake Bars are incredibly versatile. Serve them chilled as a delightful dessert after a meal, cut into elegant squares for a potluck or party, or even enjoy a smaller piece as a decadent afternoon pick-me-up. They pair wonderfully with a dollop of whipped cream or a drizzle of raspberry sauce, but honestly, they are perfect just as they are.
Don’t be afraid to experiment with variations! Consider adding a swirl of caramel, a sprinkle of chopped nuts, or even a hint of espresso powder to the cheesecake batter for a new flavor dimension. The possibilities are endless, and each tweak will result in a unique and delicious experience.
I encourage you to give this recipe a try. It’s simpler than you might think, and the rewards are absolutely worth it. Happy baking, and may your Chocolate Chip Cheesecake Bars be the talk of your next gathering!
Frequently Asked Questions:
Q: How should I store leftover Chocolate Chip Cheesecake Bars?
A: For the best results, store your Chocolate Chip Cheesecake Bars in an airtight container in the refrigerator. They will keep well for up to 3-4 days. You can also freeze them; wrap individual bars tightly in plastic wrap, then in foil, and freeze for up to 2 months. Thaw them in the refrigerator overnight before enjoying.
Q: Can I make the Chocolate Chip Cheesecake Bars ahead of time?
A: Absolutely! These bars are an excellent make-ahead dessert. In fact, they often taste even better the next day as the flavors meld together. Prepare them completely, let them chill thoroughly, and then refrigerate until ready to serve.
Decadent Chocolate Chip Cheesecake Bars-Easy Recipe
A simple yet decadent recipe combining the rich indulgence of cheesecake with the comforting familiarity of chocolate chip cookies, baked into easy-to-serve bars.
Ingredients
-
40 oz refrigerated chocolate chip cookie dough
-
16 oz cream cheese, softened to room temperature
-
1 large egg, at room temperature
-
1/4 cup granulated sugar
-
1/2 tsp vanilla extract
-
1 tsp lemon juice (optional, but highly recommended for brightness)
Instructions
-
Step 1
Preheat oven to 350 degrees Fahrenheit (175 degrees Celsius). Line a 9×13 inch baking pan with parchment paper, leaving an overhang on two opposite sides. -
Step 2
Press two-thirds of the cookie dough evenly into the bottom of the prepared pan to form the base. Use your hands or a flat-bottomed glass for an even layer. -
Step 3
In a medium bowl, beat softened cream cheese and granulated sugar with an electric mixer until smooth. Add the egg and vanilla extract, beating until just combined. Stir in optional lemon juice. -
Step 4
Pour the cheesecake filling evenly over the cookie dough base. Crumble or flatten the remaining one-third of cookie dough and distribute it over the cheesecake layer. -
Step 5
Bake for 30-40 minutes, or until the edges of the cheesecake are set and the cookie dough topping is golden brown. Let cool completely on a wire rack, then chill in the refrigerator for at least 2-3 hours, or preferably overnight. -
Step 6
Use the parchment paper overhangs to lift the chilled bars from the pan. Place on a cutting board and cut into desired bar or square sizes.
Important Information
Nutrition Facts (Per Serving)
It is important to consider this information as approximate and not to use it as definitive health advice.
Allergy Information
Please check ingredients for potential allergens and consult a health professional if in doubt.