Christmas Lights Sugar Cookies-Festive & Bright Recipe
Christmas Lights Sugar Cookies are more than just a festive treat; they’re a beacon of holiday cheer, a tradition baked into every bite. As the twinkling lights adorn homes and trees, these delightful cookies capture that same magical glow, transforming simple ingredients into edible works of art. Why do we adore them so? It’s the perfect balance of sweet, buttery goodness with a satisfying crispness, a canvas for our creativity to truly shine. What sets these Christmas Lights Sugar Cookies apart is their versatility. Whether you’re a seasoned baker or a novice in the kitchen, these cookies are designed to bring joy and a touch of sparkle to your celebrations. Imagin extracte a batch fresh from the oven, their aroma filling your home with the essence of the holidays. They’re not just cookies; they’re memories waiting to be made, a testament to the warmth and wonder of the season.
Ingredients:
- 6 cups all-purpose flour (approximately 2 pounds)
- 2 teaspoons baking powder
- 2 teaspoons salt
- 4 sticks unsalted butter, softened to room temperature (1 pound)
- 2 cups granulated sugar
- 2 large eggs, at room temperature
- 2 teaspoons pure vanilla extract
- 16 ounces powdered sugar (approximately 1 pound)
- 1/4 cup plus 1 tablespoon meringue powder
- 1/3 cup water, plus more as needed for thinning the icing
- Food coloring (Wilton icing gels recommended for vibrant colors)
Preparing the Cookie Dough
Mixing the Dry Ingredients
In a medium-sized bowl, I like to whisk together my dry ingredients first. This ensures everything is evenly distributed, which is crucial for consistent cookie texture. So, I’ll combine the 6 cups of all-purpose flour, 2 teaspoons of baking powder, and 2 teaspoons of salt. Give it a good whisk until there are no visible clumps of baking powder or salt. Set this bowl aside for now.
Creaming the Butter and Sugar
Now, for the wet ingredients. In a large mixing bowl, or the bowl of your stand mixer fitted with the paddle attachment, I’ll begin extract by creaming the 4 sticks of softened unsalted butter with the 2 cups of granulated sugar. It’s essential that your butter is truly at room temperature – soft enough to leave an indentation when pressed with your finger, but not melted. Creaming them together for about 3-5 minutes on medium speed is key. You want this mixture to become light and fluffy, pnon-alcoholic ale yellow in color. This process incorporates air, which contributes to a tender cookie.
Adding Eggs and Vanilla
Next, I’ll add the 2 large eggs, one at a time, making sure each egg is fully incorporated before adding the next. Again, room temperature eggs will emulsify better with the butter and sugar mixture, preventing any greasiness. After the eggs are mixed in, I’ll stir in the 2 teaspoons of pure vanilla extract. The aroma at this stage is already starting to smell like holidays!
Combining Wet and Dry Ingredients
Now it’s time to bring it all together. Gradually add the dry ingredient mixture to the wet ingredients, mixing on low speed. I usually add it in three additions, mixing until just combined after each addition. Be careful not to overmix at this stage, as overmixing can develop the gluten in the flour, resulting in tough cookies. Once the dough just starts to come together, it might look a bit shaggy, which is perfectly fine.
Chilling the Dough
The dough is a little sticky at this point, so chilling is essential for easy handling and shaping. I’ll divide the dough in half, flatten each half into a disc, wrap them tightly in plastic wrap, and refrigerate for at least 2 hours, or even overnight. Chilling solidifies the butter, making the dough firm and much easier to roll out.
Rolling, Cutting, and Baking the Cookies
Rolling and Cutting the Shapes
Once the dough is chilled and firm, I’ll take one disc out of the refrigerator at a time. Lightly flour your work surface and your rolling pin. I like to roll the dough to about 1/4-inch thickness. This ensures the cookies bake evenly and hold their shape. Use your favorite Christmas-themed cookie cutters – think stars, trees, ornaments, and of course, string-like shapes that will look great as “Christmas lights.” Gather the scraps, re-roll them gently (try not to overwork them), and cut out more cookies.
Baking the Cookies
Preheat your oven to 350°F (175°C). Line baking sheets with parchment paper. Carefully transfer the cut-out cookies onto the prepared baking sheets, leaving a little space between them. Bake for 8-10 minutes, or until the edges are lightly golden brown. Keep a close eye on them, as oven temperatures can vary. Overbaked cookies will be dry and hard. Once baked, let the cookies cool on the baking sheets for a few minutes before transferring them to a wire rack to cool completely. This is crucial for them to firm up before decorating.
Decorating with Royal Icing
Making the Royal Icing Base
While the cookies are cooling, it’s time to prepare the royal icing. In a clean, dry bowl, combine the 16 ounces of powdered sugar and 1/4 cup plus 1 tablespoon of meringue powder. Whisk them together thoroughly to break up any lumps. Gradually add the 1/3 cup of water, mixing on low speed (or by hand) until smooth. The consistency should be like toothpaste – thick enough to hold its shape but still pipeable. If it’s too thick, add water a teaspoon at a time. If it’s too thin, add more powdered sugar, a tablespoon at a time.
Coloring the Icing
This is where the fun rgin extractly begins! Divide the royal icing into separate bowls, one for each color you want. I recommend using gel food coloring for the most vibrant Christmas light colors: reds, greens, blues, yellows, and maybe even some white. Add a small amount of gel coloring to each bowl and stir until you achieve your desired shade. Remember that gel colors are concentrated, so a little goes a long way. Stir until the color is uniform and there are no streaks.
Piping the Christmas Lights
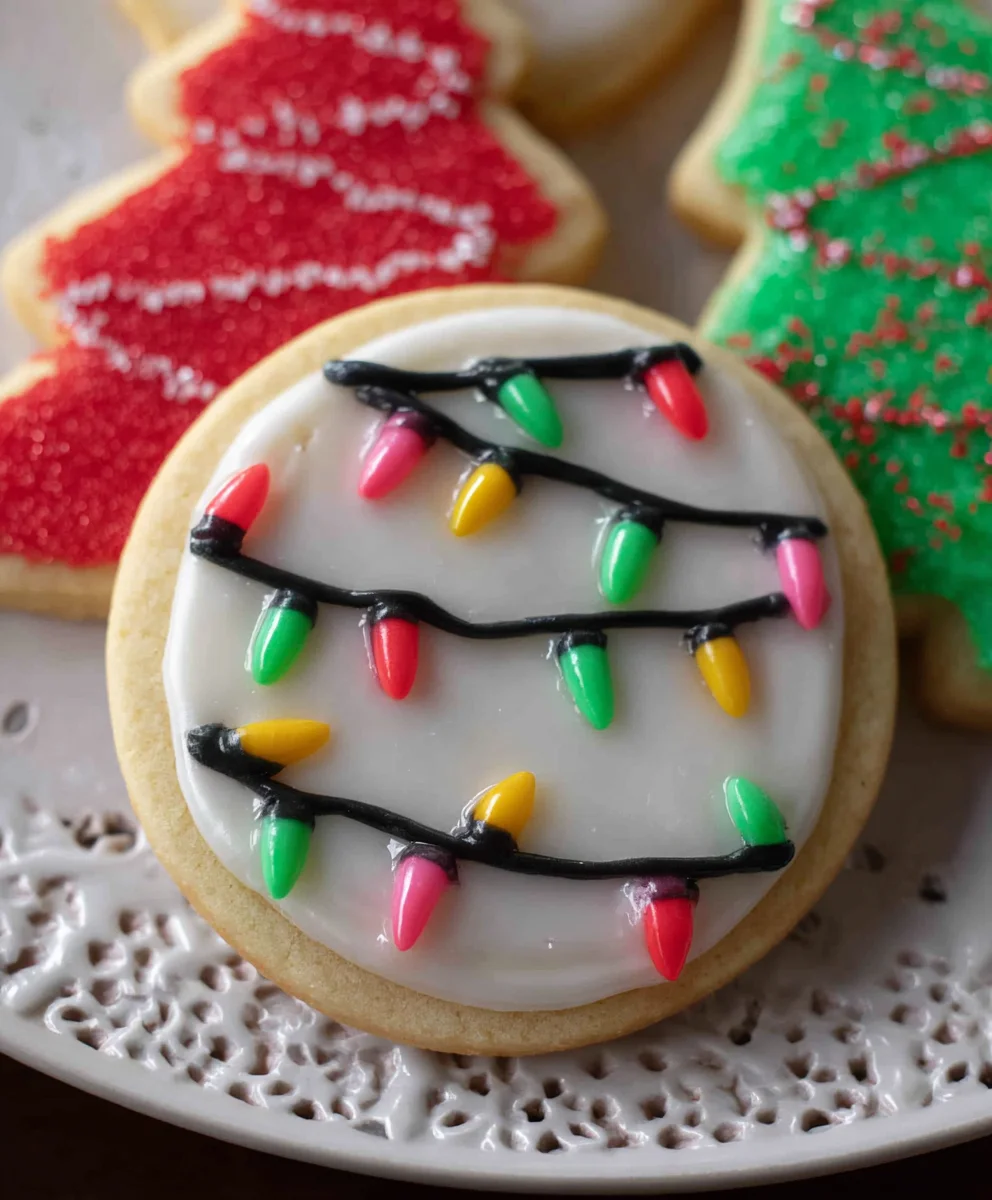
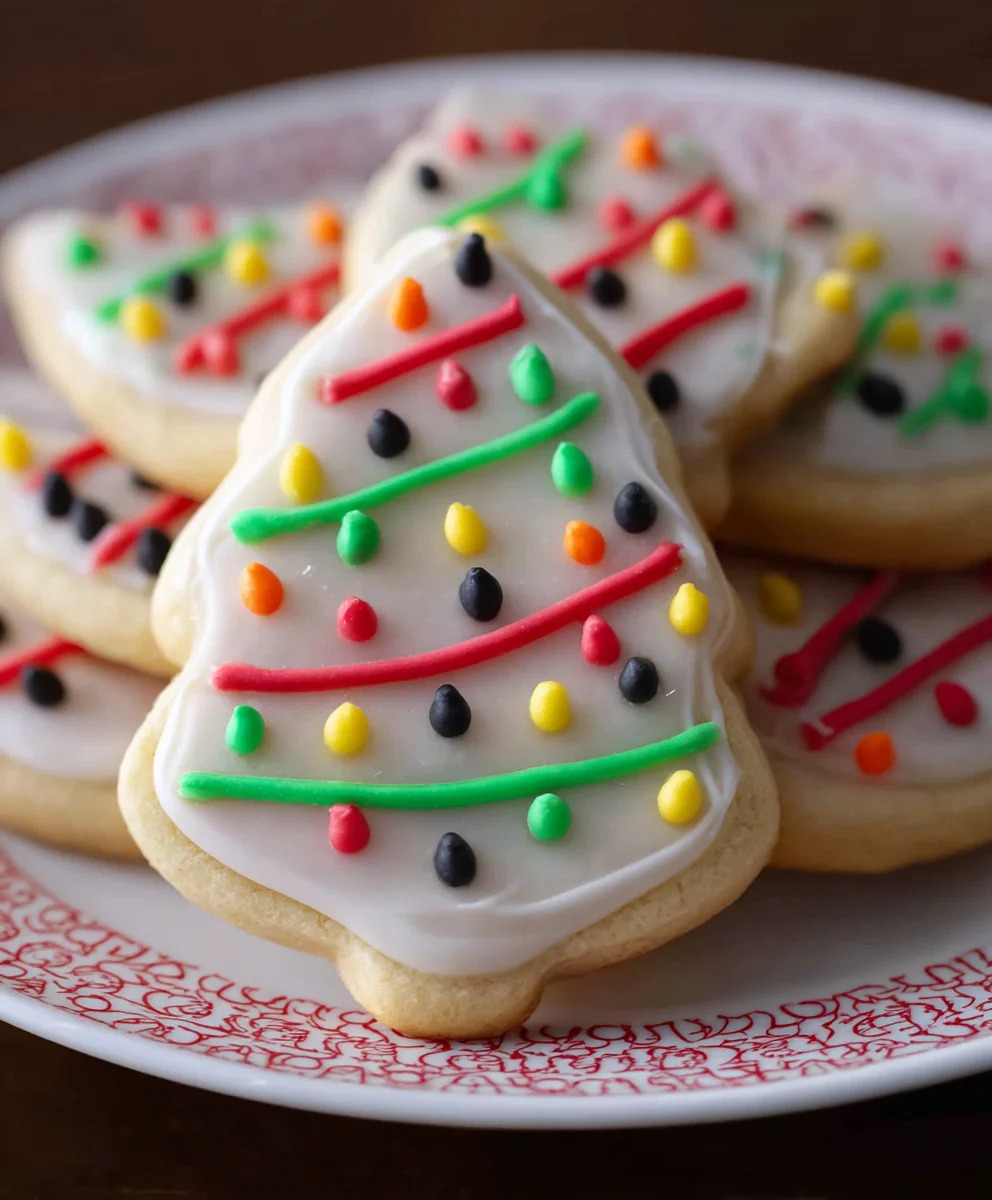
Transfer your colored icings into piping bags fitted with small round tips. For the “Christmas lights” effect, I like to pipe small dots or elongated oval shapes onto my cookie cutouts, mimicking individual light bulbs. For string lights, I pipe a thin line of white or silver icing to connect the “bulbs.” You can also outline and flood larger cookies with different colors to represent ornaments or festive shapes. Be creative and have fun with it! Don’t worry if your lines aren’t perfect; the charm of Christmas cookies is often in their handmade look.
Drying and Finishing Touches
Allow the decorated cookies to dry completely. This can take several hours, depending on the humidity and the thickness of the icing. Once the icing is hardened, you can add any extra details like piping outlines or small decorative dots. For cookies intended to be hung on a tree, make sure to pipe a small loop at the top before the icing fully sets. Store the dried cookies in airtight containers at room temperature.
Conclusion:
You’ve now learned how to create beautiful and delicious Christmas Lights Sugar Cookies! This recipe offers a delightful way to bring festive cheer to your kitchen and your table. The simple yet classic sugar cookie base is perfect for decorating, allowing your creativity to shine. Whether you’re a seasoned baker or new to the kitchen, these cookies are a rewarding project that will impress everyone. Don’t be afraid to experiment with different frosting colors and edible glitter to make your Christmas lights truly sparkle!
For serving, these cookies are a fantastic addition to any holiday gathering, cookie exchange, or as a sweet treat with a warm mug of hot chocolate. They also make wonderful homemade gifts, lovingly packaged in cellophane bags tied with festive ribbon. Consider pairing them with other holiday favorites like gin extractgerbread or peppermint cookies for a diverse cookie platter.
If you’re looking for variations, try adding a touch of almond extract to the dough for a different flavor profile, or use a zesting of orange or lemon for a citrusy twist. You could also experiment with colored dough before cutting out the shapes.
So, gather your ingredients, put on some festive music, and enjoy the process of making these delightful Christmas Lights Sugar Cookies. Happy baking, and may your holidays be merry and bright!
Frequently Asked Questions:
Q1: How can I ensure my sugar cookies are soft and chewy, not hard?
A1: To achieve a soft and chewy texture for your Christmas Lights Sugar Cookies, be careful not to overmix the dough once the flour is added. Also, avoid overbaking them. Bake until the edges are just lightly golden brown, and let them cool completely on the baking sheet before transferring them. This residual heat will continue to cook them gently.
Q2: Can I freeze the un-iced Christmas Lights Sugar Cookies?
A2: Yes, absolutely! Once your Christmas Lights Sugar Cookies have cooled completely, you can freeze them in an airtight container or a freezer-safe bag for up to 2-3 months. For best results, place parchment paper between layers of cookies to prevent sticking. Thaw them at room temperature before decorating.
Christmas Lights Sugar Cookies-Festive & Bright Recipe
Bright and festive sugar cookies decorated to look like colorful Christmas lights, perfect for holiday baking.
Ingredients
-
6 cups all-purpose flour (approximately 2 pounds)
-
2 teaspoons baking powder
-
2 teaspoons salt
-
4 sticks unsalted butter, softened to room temperature (1 pound)
-
2 cups granulated sugar
-
2 large eggs, at room temperature
-
2 teaspoons pure vanilla extract
-
16 ounces powdered sugar (approximately 1 pound)
-
1/4 cup plus 1 tablespoon meringue powder
-
1/3 cup water, plus more as needed for thinning the icing
-
Food coloring (Wilton icing gels recommended for vibrant colors)
Instructions
-
Step 1
In a medium bowl, whisk together 6 cups all-purpose flour, 2 teaspoons baking powder, and 2 teaspoons salt. Set aside. In a large bowl or stand mixer, cream 4 sticks softened unsalted butter and 2 cups granulated sugar on medium speed for 3-5 minutes until light and fluffy. Beat in 2 large eggs one at a time, then stir in 2 teaspoons pure vanilla extract. Gradually add the dry ingredients to the wet ingredients in three additions, mixing on low speed until just combined. Do not overmix. -
Step 2
Divide the dough in half, flatten each half into a disc, wrap tightly in plastic wrap, and refrigerate for at least 2 hours, or overnight, until firm. -
Step 3
Preheat oven to 350°F (175°C). Line baking sheets with parchment paper. On a lightly floured surface, roll out one disc of dough to about 1/4-inch thickness. Cut out Christmas-themed shapes using cookie cutters. Place cookies on prepared baking sheets, leaving space between them. -
Step 4
Bake for 8-10 minutes, or until edges are lightly golden brown. Let cookies cool on baking sheets for a few minutes before transferring to a wire rack to cool completely. -
Step 5
While cookies cool, prepare royal icing. In a clean bowl, whisk together 16 ounces powdered sugar and 1/4 cup plus 1 tablespoon meringue powder. Gradually add 1/3 cup water, mixing until smooth and toothpaste-like. Adjust consistency with more water (a teaspoon at a time) or powdered sugar (a tablespoon at a time) as needed. -
Step 6
Divide icing into bowls for desired colors. Add gel food coloring and stir until uniform. Transfer colored icings to piping bags fitted with small round tips. Pipe dots or oval shapes to resemble light bulbs onto cookies, and thin lines of white or silver icing to connect them for string lights. Outline and flood larger cookies as desired. -
Step 7
Allow decorated cookies to dry completely (several hours). Once icing is hardened, add any final details. Store dried cookies in airtight containers at room temperature.
Important Information
Nutrition Facts (Per Serving)
It is important to consider this information as approximate and not to use it as definitive health advice.
Allergy Information
Please check ingredients for potential allergens and consult a health professional if in doubt.