Brown Butter Brookies-Decadent Dessert Delight
Brown Butter Brookies are more than just a dessert; they are an experience. Imagin extracte the rich, nutty aroma of browned butter wafting through your kitchen, a prelude to pure indulgence. These incredible treats, a glorious fusion of chewy chocolate chip cookies and fudgy brownies, have captured the hearts (and taste buds) of dessert lovers everywhere. What’s not to adore? You get the best of both worlds in every single bite. The magic of brown butter elevates this already divine combination, adding a depth of flavor that’s simply unforgettable. It’s that little extra step that transforms a good dessert into something truly extraordinary, a testament to the power of simple ingredients treated with a touch of culinary magic. Get ready to meet your new favorite obsession!
Brown Butter Brookies
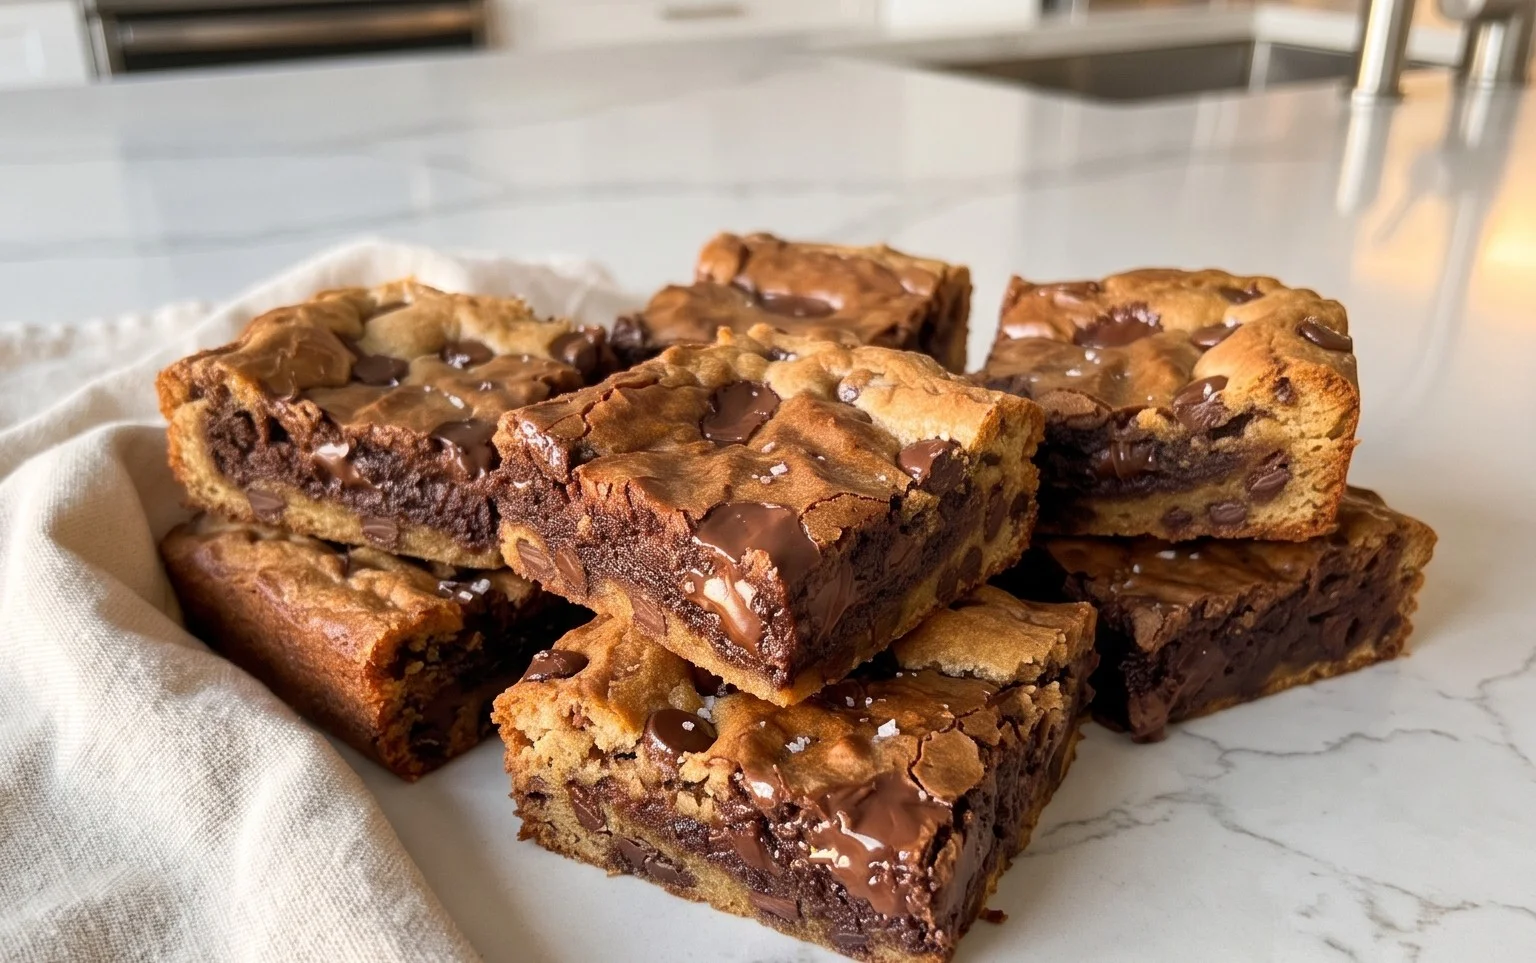
Get ready for the ultimate dessert mashup! Brookies, the glorious hybrid of brownies and cookies, have always been a crowd-pleaser. But we’re taking them to a whole new level with the magic of brown butter. That nutty, toasty aroma and deep flavor infused into both the brownie and cookie layers create a truly decadent experience. This recipe is designed to deliver a perfectly chewy cookie base with a rich, fudgy brownie swirled on top, studded with generous amounts of chocolate chips.
This recipe might seem a little involved with two distinct components, but trust me, the end result is absolutely worth every step. We’ll be making our brown butter first, as it needs to cool slightly before we incorporate it into our cookie dough. Then, we’ll whip up a simple yet incredibly fudgy brownie batter. The beauty of this recipe is the flexibility – you can swirl the brownie into the cookie dough as much or as little as you like, creating a unique pattern in every single brookie.
Ingredients:
Instructions:
Part 1: Making the Brown Butter for the Cookie Dough
Part 2: Preparing the Cookie Dough Base
Part 3: Crafting the Fudgy Brownie Batter
Part 4: Assembling and Baking the Brookies
Conclusion:
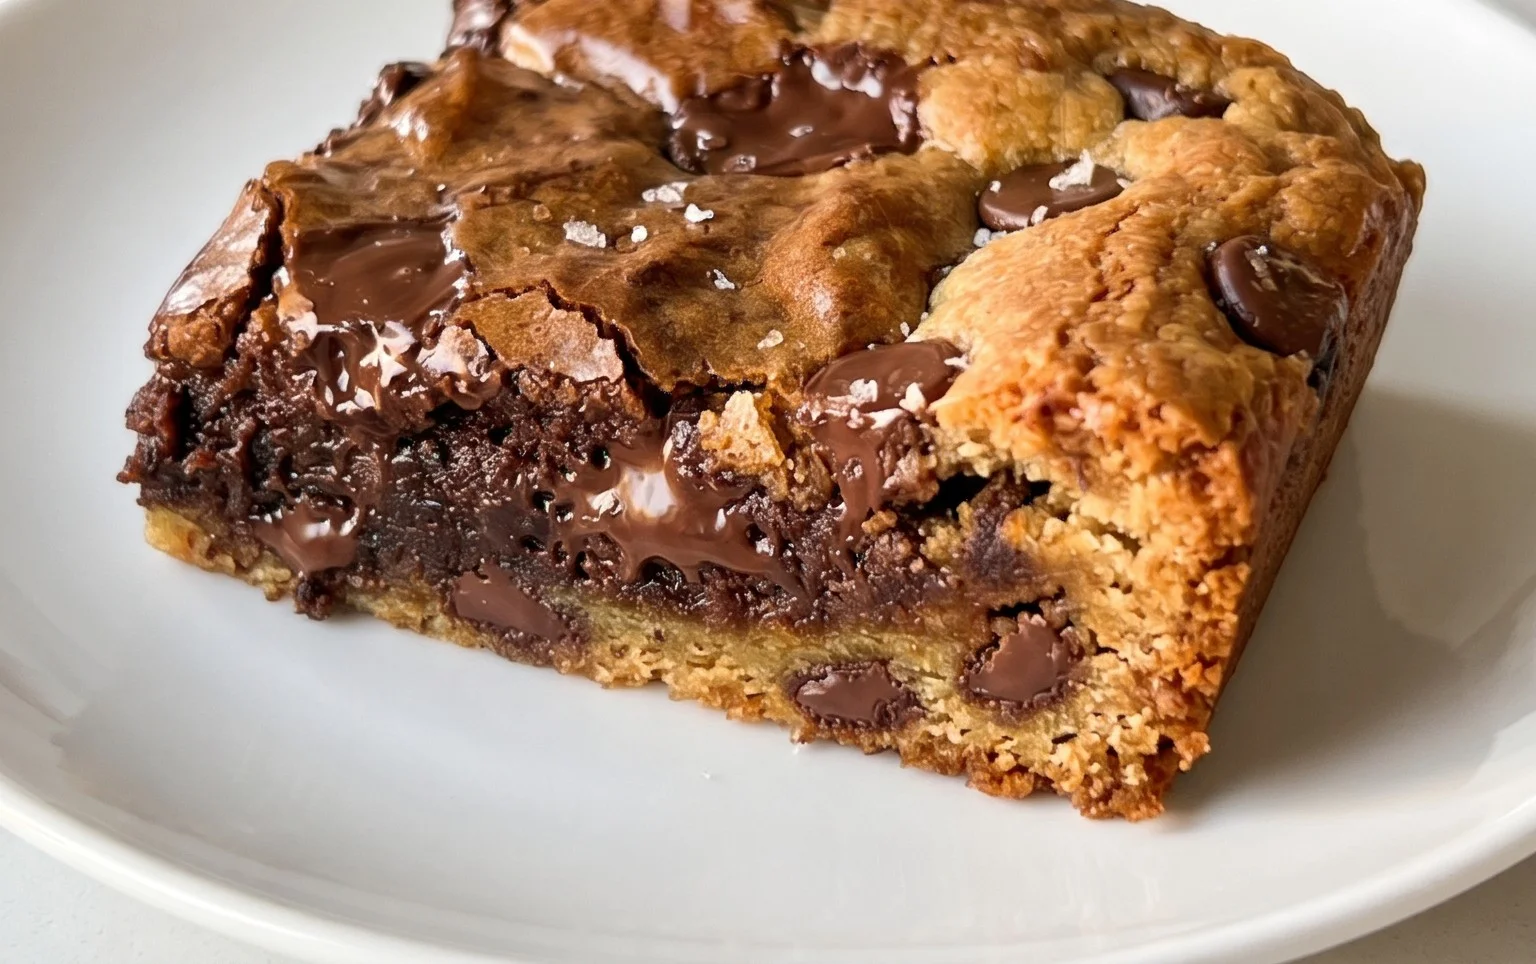
I hope you’ve enjoyed diving into the decadent world of brown butter brookies! This recipe truly strikes a perfect balance between the chewy richness of a blondie and the fudgy intensity of a brownie, elevated by the nutty, caramel notes of browned butter. It’s a guaranteed crowd-pleaser, perfect for potlucks, holidays, or simply a special treat for yourself. The aroma alone as they bake is enough to make your kitchen feel like a gourmet bakery!
Serving suggestions abound! These brown butter brookies are divine served warm, perhaps with a scoop of vanilla bean ice cream for an extra layer of indulgence. They also hold up beautifully at room temperature, making them ideal for picnics or packed lunches. Consider drizzling them with extra melted chocolate or a sprinkle of sea salt before serving for a touch of elegance.
Don’t be afraid to experiment with variations! You could easily fold in some chopped nuts like pecans or walnuts into the brownie layer for added crunch. White chocolate chips can offer a lovely contrast to the dark chocolate in the brownie portion. Even a swirl of peanut butter or caramel sauce could elevate these treats to new heights. So please, gather your ingredients and give these incredible brown butter brookies a try – you won’t regret it!
Frequently Asked Questions:
Can I make brown butter brookies ahead of time?
Absolutely! Brown butter brookies can be made a day or two in advance and stored in an airtight container at room temperature. They actually tend to develop even more flavor and a slightly chewier texture as they sit.
How do I properly brown butter?
To brown butter, melt unsalted butter in a light-colored saucepan over medium heat. Stir it frequently. The butter will foam, then the milk solids will begin extract to toast, turning golden brown and releasing a nutty aroma. Watch it closely to prevent burning! Once it reaches a rich amber color, immediately remove it from the heat.
Brown Butter Brookies
A decadent combination of chewy chocolate chip cookies and rich chocolate brownies, elevated with the nutty aroma of brown butter.
Ingredients
-
14.5 tbsp salted butter (206 grams)
-
3/4 cup dark brown sugar, packed (163 grams)
-
3/4 cup granulated sugar (156 grams)
-
2 large eggs, at room temperature
-
1 and 1/2 tsp vanilla extract
-
3 cups all-purpose flour, spooned & leveled or weighed out (390 grams)
-
1 tsp baking soda
-
1 tsp baking powder
-
1/2 tsp salt
-
1 and 1/2 cups chocolate chips (270 grams)
-
3/4 cup salted butter, cubed (170 grams before browning, 140 grams after)
-
4 ounces semi-sweet chocolate, chopped (113 grams)
-
1/4 cup vegetable oil (55 grams)
-
3/4 cup cocoa powder (63 grams)
-
3 large eggs, at room temperature
Instructions
-
Step 1
For the brownie layer: Melt 3/4 cup salted butter in a saucepan over medium heat. Cook, stirring occasionally, until it turns a nutty brown and smells fragrant. Remove from heat and let cool slightly. Stir in the chopped semi-sweet chocolate until melted. In a large bowl, whisk together the cooled brown butter mixture, vegetable oil, 3 large eggs, and 1 tsp vanilla extract. Gradually add the cocoa powder and 1/2 tsp salt, mixing until just combined. Stir in 1 cup of the chocolate chips. -
Step 2
For the cookie layer: In a separate large bowl, cream together 14.5 tbsp salted butter, dark brown sugar, and granulated sugar until light and fluffy. Beat in 2 large eggs and 1.5 tsp vanilla extract until well combined. -
Step 3
In a medium bowl, whisk together the all-purpose flour, baking soda, and baking powder. Gradually add the dry ingredients to the wet ingredients for the cookie layer, mixing until just combined. Stir in the remaining 1/2 cup of chocolate chips. -
Step 4
Preheat your oven to 350°F (175°C). Grease and flour a 9×13 inch baking pan. -
Step 5
Spread the brownie batter evenly into the prepared baking pan. Dollop spoonfuls of the cookie dough over the brownie batter. Gently spread the cookie dough to cover the brownie layer as much as possible, it doesn’t need to be perfect. -
Step 6
Bake for 25-30 minutes, or until a toothpick inserted into the center comes out with moist crumbs (not wet batter). Let cool completely in the pan before cutting into squares.
Important Information
Nutrition Facts (Per Serving)
It is important to consider this information as approximate and not to use it as definitive health advice.
Allergy Information
Please check ingredients for potential allergens and consult a health professional if in doubt.