Easy Homemade Strawberry Ice Cream Recipe
Homemade strawberry ice cream is a truly magical treat, a burst of pure summer sunshine captured in every creamy spoonful. There’s something undeniably special about this classic flavor; it evokes memories of lazy afternoons, ripe berries picked straight from the patch, and the simple joy of a perfectly chilled dessert. Unlike store-bought versions, our homemade strawberry ice cream allows us to control the quality of our ingredients, ensuring a vibrant, natural strawberry flavor that’s both sweet and delightfully tart. We’ll transform fresh, juicy strawberries into a smooth, luscious base that will have you wondering why you ever settled for anything less. Get ready to create your own masterpiece and experience the unparalleled delight of truly exceptional homemade strawberry ice cream!
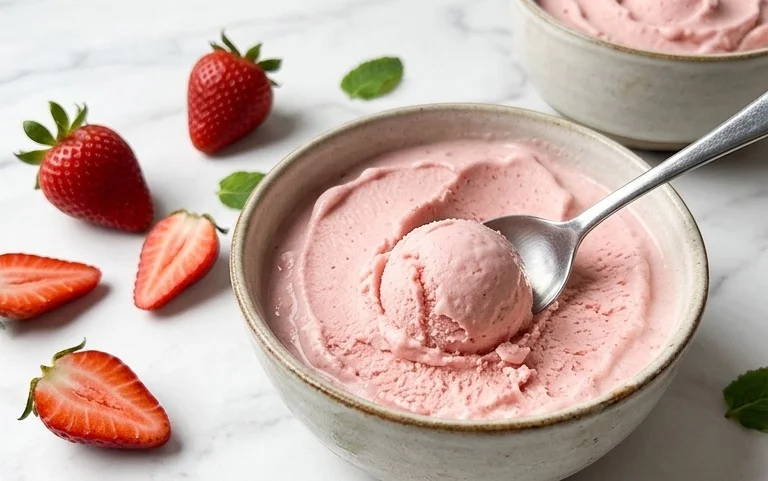
Homemade Strawberry Ice Cream
There’s something incredibly special about homemade ice cream. The creamy texture, the vibrant, fresh flavor – it’s a world away from anything you can buy at the store. And when that flavor is the sweet, slightly tart burst of summer strawberries, well, you’ve just created pure bliss. This recipe for homemade strawberry ice cream is surprisingly simple, relying on a few key ingredients to deliver an unforgettable treat. Forget complicated custards or fancy equipment; all you really need is a willingness to embrace the magic of frozen fruit and dairy. Get ready to impress yourself and anyone lucky enough to share a scoop (or two!).
This recipe focuses on capturing the pure essence of fresh strawberries. We’re not aiming for an overly sweet, cloying ice cream; instead, we want the natural sweetness and vibrant tang of the fruit to shine through, balanced by the richness of cream. The touch of honey adds a wonderful depth of flavor, while the lemon juice brightens everything up, preventing the strawberry flavor from becoming one-dimensional. And of course, the combination of heavy cream and half-and-half provides that luxurious, smooth texture we all crave in a good ice cream.
Ingredients:
This recipe is designed to be made without an ice cream maker, making it accessible to everyone. We’ll be using a freezing and stirring method that, while requiring a bit more manual effort, yields fantastic results. The key is consistent stirring to break up ice crystals and ensure a smooth, creamy consistency.
Strawberry Preparation
The first step to amazing strawberry ice cream is to properly prepare our star ingredient. You’ll want to start with ripe, flavorful strawberries for the best taste. Hull them by removing the green leafy tops. Then, dice them into relatively small pieces. This will help them break down more easily and release their juices. Don’t worry about perfect uniformity; a little variation in size is fine.
Creating the Strawberry Base
In a medium bowl, combine your diced strawberries, honey, granulated sugar, and lemon juice. Gently stir everything together. We want the sugar and honey to start macerating the strawberries, drawing out their natural juices and creating a syrupy base. Let this mixture sit for at least 30 minutes, or even up to an hour, at room temperature. You’ll notice that the strawberries will soften and release a significant amount of delicious, pink liquid. This syrupy mixture is where all that incredible strawberry flavor is concentrated. You can also lightly mash some of the strawberries with a fork if you prefer a smoother ice cream, but I like to leave some small pieces for texture.
Blending the Creamy Components
While the strawberries are doing their magic, in a separate bowl, combine the heavy whipping cream, half-and-half, and vanilla extract. Whisk these together until they are just combined. You don’t want to over-whisk and create whipped cream at this stage; we’re just aiming for a smooth, well-blended liquid base. This combination of fats from the heavy cream and the slightly lighter half-and-half is what gives our ice cream its signature creamy richness. The vanilla extract adds a classic, comforting note that complements the strawberry beautifully.
Combining and Chilling
Once your strawberry mixture has had time to macerate and your cream mixture is ready, it’s time to bring them together. Pour the cream mixture into the bowl with the strawberries and their juices. Stir everything gently to combine. Now, this is a crucial step for achieving that smooth, scoopable texture without an ice cream maker. You’ll want to transfer this mixture into a shallow, freezer-safe container. A metal baking pan or a plastic container with a wide surface area works well. Cover the container tightly with plastic wrap, pressing it directly onto the surface of the ice cream mixture to prevent ice crystals from forming on top. Place this in the freezer.
The Freezing and Stirring Process
This is where the patience comes in! For the next 3-4 hours, you’ll need to remove the container from the freezer approximately every 30-45 minutes and give the mixture a vigorous stir. Use a fork or a whisk to break up any ice crystals that are starting to form around the edges and throughout the mixture. Scrape down the sides and bottom of the container. The goal is to keep the mixture as smooth as possible. As you continue this process, you’ll notice the mixture gradually thickening and becoming more opaque. Each stirring session breaks down those ice crystals, leading to a creamier end product. Don’t skip these stirs, as they are absolutely vital to achieving a non-icy ice cream.
Final Freezing and Serving
After your initial 3-4 hours of stirring, the ice cream should be quite thick and resemble a soft-serve consistency. At this point, give it one final, thorough stir. Then, cover it tightly again and return it to the freezer for at least another 2-3 hours, or until it’s firm enough to scoop. The longer it freezes, the harder it will become, so adjust the time based on your desired firmness. When you’re ready to serve, let the ice cream sit at room temperature for about 5-10 minutes to soften slightly, making it easier to scoop. Enjoy your incredible, homemade strawberry ice cream! The taste of fresh strawberries, combined with that perfect creamy texture, is truly unparalleled.
Conclusion:
There you have it – a simple yet incredibly rewarding recipe for homemade strawberry ice cream! This recipe is fantastic because it allows you to control the quality of your ingredients, resulting in a vibrant, fresh strawberry flavor that store-bought varieties often can’t match. The creamy texture combined with the sweet tang of real strawberries is truly a taste of summer, no matter the season.
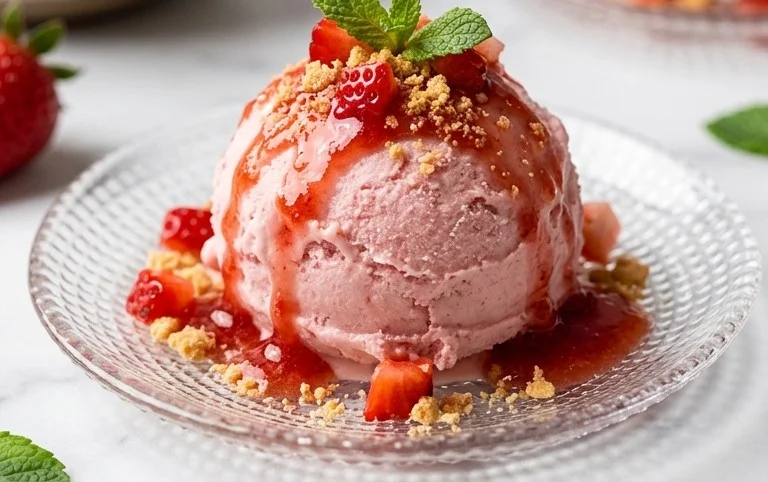
Serving this delightful treat is easy – it’s perfect on its own, or you can elevate it with a drizzle of fresh strawberry coulis, a sprinkle of toasted almonds, or even a dollop of whipped cream. For variations, consider adding a splash of balsamic glaze for a sophisticated twist, or folding in some fresh basil for a surprisingly refreshing flavor combination. Don’t be shy about experimenting! I truly encourage you to give this homemade strawberry ice cream a try; the effort is minimal, and the delicious payoff is immense. It’s a project that brings pure joy to the kitchen and even more joy to your taste buds.
Frequently Asked Questions:
Why is my homemade strawberry ice cream not creamy enough?
A lack of creaminess can often be due to insufficient fat content or over-churning, which can introduce too much air. Ensure you’re using full-fat dairy (heavy cream and whole milk) for the best results. Also, avoid over-churning your ice cream in the ice cream maker; stop once it reaches a soft-serve consistency, then freeze it to firm up.
Can I make this strawberry ice cream without an ice cream maker?
Absolutely! While an ice cream maker makes the process smoother, you can achieve a delicious result by freezing the mixture in a shallow container and stirring it vigorously with a fork every 30-45 minutes for the first 3-4 hours. This breaks up ice crystals and helps create a smoother texture. It requires a bit more manual effort but is definitely worth it!
Homemade Strawberry Ice Cream
A simple and delicious homemade strawberry ice cream recipe using fresh ingredients.
Ingredients
-
1 1/2 cups strawberries, hulled and diced
-
2 Tbsp honey
-
1/2 cup granulated sugar
-
1 tsp lemon juice
-
1 cup heavy whipping cream
-
1/2 cup half and half
-
1 tsp vanilla extract
Instructions
-
Step 1
In a bowl, combine the diced strawberries, honey, granulated sugar, and lemon juice. Let it sit for about 15-20 minutes, stirring occasionally, until the strawberries have released some of their juices. -
Step 2
Transfer the strawberry mixture to a blender or food processor and puree until smooth. Strain through a fine-mesh sieve to remove seeds, if desired. Chill the strawberry puree. -
Step 3
In a separate bowl, whisk together the heavy whipping cream, half and half, and vanilla extract until well combined. This is your ice cream base. -
Step 4
Pour the chilled strawberry puree into the ice cream base and stir until thoroughly mixed. Ensure a uniform pink color. -
Step 5
Pour the mixture into your ice cream maker and churn according to the manufacturer’s instructions until it reaches a soft-serve consistency. -
Step 6
Transfer the churned ice cream to an airtight container and freeze for at least 4-6 hours, or until firm enough to scoop.
Important Information
Nutrition Facts (Per Serving)
It is important to consider this information as approximate and not to use it as definitive health advice.
Allergy Information
Please check ingredients for potential allergens and consult a health professional if in doubt.