Crispy Zucchini Chips- The Perfect Oven-Baked Snack
Crispy zucchini chips are the ultimate snack hack, transforming a humble garden vegetable into a guilt-free, craveable delight. Forget greasy potato chips; these golden-brown wonders offer a satisfying crunch with every bite, proving that healthy can be incredibly delicious. I absolutely adore making these crispy zucchini chips because they’re so versatile and genuinely impress anyone who tries them. What makes them truly special is the magic that happens in the oven (or air fryer!), where the thin slices of zucchini lose their moisture and transform into delicate, airy crisps. They’re perfect for a light appetizer, a delightful side dish, or just a fantastic way to use up an abundance of summer squash. Get ready to discover your new favorite healthy indulgence with these sensational crispy zucchini chips!
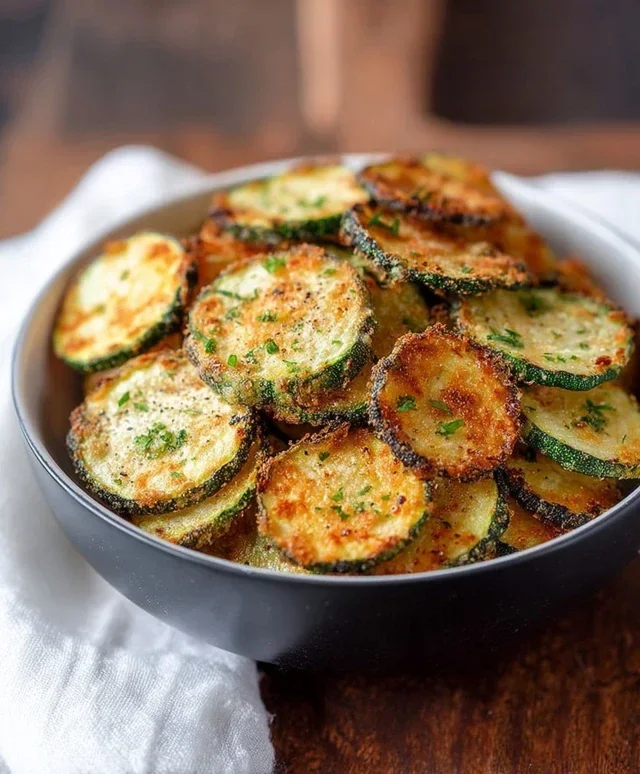
Crispy Zucchini Chips
Are you looking for a delicious and healthy way to enjoy those garden-fresh zucchinis? Forget the fried versions; these oven-baked crispy zucchini chips are incredibly satisfying and surprisingly easy to make. They’re a fantastic alternative to potato chips, offering a delightful crunch and a subtle, fresh flavor that pairs wonderfully with a sprinkle of savory spices and, if you’re feeling indulgent, a dusting of parmesan cheese. I love making these as a snack for movie nights, a light side dish, or even as a fun appetizer. The key to achieving that perfect crispiness lies in how we prepare and bake them, so let’s dive in!
Ingredients:
Preparing the Zucchini
Step 1: Wash and Trim Your Zucchinis
The first step to achieving perfectly crispy zucchini chips is to start with fresh, firm zucchinis. Give them a good rinse under cool running water to remove any dirt or debris. Then, use a sharp knife to trim off both ends of each zucchini. You want to remove the stem and blossom ends cleanly. Don’t worry if your zucchinis aren’t perfectly uniform in size; it just adds to the rustic charm of these homemade chips.
Step 2: Achieving Ultra-Thin Slices for Maximum Crispiness
This is arguably the most crucial step for getting that signature crunch. You need to slice the zucchinis as thinly as possible. A mandoline slicer is your best friend here, as it ensures consistent, paper-thin slices. If you don’t have a mandoline, a very sharp knife and a steady hand will work, but it will require more patience and precision. Aim for slices that are almost translucent – about 1/16th of an inch thick. Thicker slices will not crisp up properly and will remain soft in the center. If you find you have thicker slices, don’t despair; just try to slice the remaining parts as thinly as you can.
Step 3: The Essential Drying Process
Once your zucchinis are sliced, they will release a lot of moisture. To prevent soggy chips, we need to draw out as much of this liquid as possible. You can do this in a couple of ways. The most effective method is to lay your zucchini slices in a single layer on a clean kitchen towel or paper towels. Then, gently pat them dry with another towel. If you have time, you can even let them sit for about 15-30 minutes on a rack set over a baking sheet, allowing excess moisture to evaporate naturally. For a quicker method, you can also gently press them between layers of paper towels. Don’t skip this step; it’s vital for achieving that satisfying crisp!
Seasoning and Baking for Perfection
Step 4: Evenly Coat with Olive Oil and Spices
Now that our zucchini slices are nice and dry, it’s time to season them! In a large bowl, combine the olive oil, sea salt, garlic powder, smoked paprika, and black pepper. Add your prepared zucchini slices to the bowl. Gently toss everything together, ensuring each slice is lightly coated with the olive oil and spice mixture. You don’t want to drown them in oil; a light coating is all you need. If you’re using grated parmesan, you can add about half of it now and reserve the rest for after baking, or wait and add it all at the end. Work in batches if your bowl isn’t large enough to avoid overcrowding and ensure even seasoning.
Step 5: Baking to Golden-Brown Perfection
Preheat your oven to 400°F (200°C). Line two baking sheets with parchment paper. This is crucial to prevent sticking and for easier cleanup. Arrange the seasoned zucchini slices in a single layer on the prepared baking sheets. It’s very important not to overcrowd the baking sheets, as this will cause the zucchini to steam rather than bake, and you won’t achieve crispiness. If necessary, use multiple baking sheets or bake in batches.
Bake for 10-15 minutes, then carefully flip each slice using a spatula or tongs. Continue baking for another 8-12 minutes, or until the edges are golden brown and the chips are crispy. Keep a close eye on them during the last few minutes of baking, as they can go from perfectly crisp to burnt very quickly due to their thinness and the sugars in the zucchini. The exact baking time will vary depending on your oven and the thickness of your slices.
Step 6: The Finishing Touch (Optional Parmesan)
Once the zucchini chips are baked to your desired crispness, remove them from the oven. If you’re adding parmesan, sprinkle the remaining grated parmesan cheese over the hot chips immediately after they come out of the oven. The residual heat will help the cheese melt slightly and adhere beautifully. Let the chips cool on the baking sheets for a few minutes. As they cool, they will continue to crisp up. They are best enjoyed warm, but they also make a decent snack once cooled.
These crispy zucchini chips are a delightful, guilt-free treat. They offer a wonderful texture and a subtle flavor that will have you reaching for more. Enjoy them on their own, or serve them with your favorite dip for an extra layer of deliciousness!
Conclusion:
There you have it! A simple yet incredibly satisfying recipe for Crispy Zucchini Chips that’s bound to become a staple in your kitchen. These aren’t just a healthy alternative to traditional fried snacks; they’re a flavor explosion in every bite, offering a delightful crunch and a subtle, sweet zucchini essence. The beauty of this recipe lies in its simplicity and versatility, allowing you to whip up a delicious treat with minimal effort and readily available ingredients. I truly hope you’ll give these crispy zucchini chips a try – you won’t be disappointed!
Serve these delightful chips as a light appetizer, a healthy snack alongside a dip like hummus or Greek yogurt ranch, or even as a crunchy topping for salads and soups. For those looking to experiment, consider adding a sprinkle of smoked paprika, garlic powder, or a pinch of chili flakes to the seasoning mix for an extra kick. You can even swap out the zucchini for other firm vegetables like eggplant or sweet potato (adjusting baking time as needed) to discover new favorites.
Frequently Asked Questions:
Why are my zucchini chips not crispy?
Several factors can contribute to less-than-crispy zucchini chips. Ensure your zucchini slices are uniformly thin – too thick and they’ll steam rather than crisp. Equally important is drying the zucchini thoroughly after slicing to remove excess moisture. Overcrowding the baking sheet can also hinder crisping, as it prevents hot air circulation. Try baking in a single layer and even flipping them halfway through the baking process.
Can I make these ahead of time?
While Crispy Zucchini Chips are best enjoyed fresh out of the oven for maximum crispness, you can bake them a few hours in advance. Store them in a single layer in a loosely covered container at room temperature to prevent them from becoming soggy. If they lose a little crispness, a quick 5-minute reheat in a low oven can often revive them.
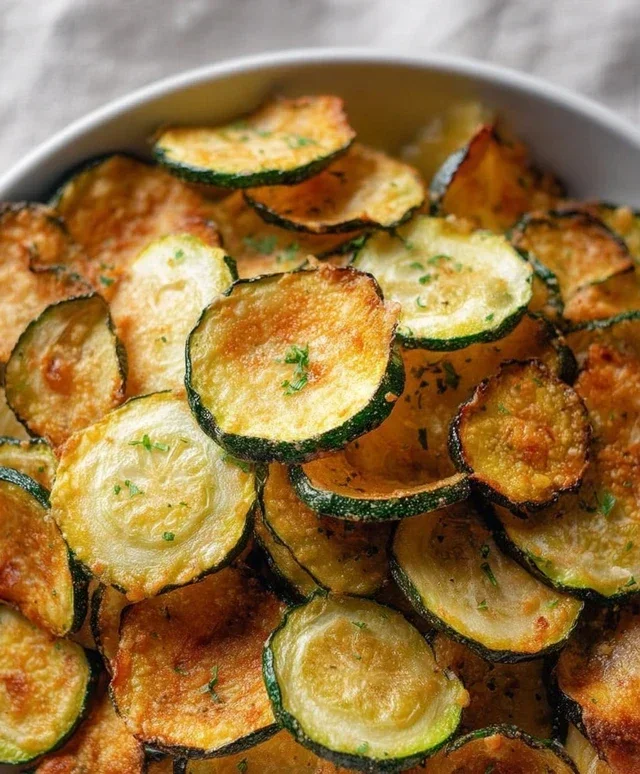
Crispy Zucchini Chips
Thinly sliced zucchini baked until perfectly crispy and seasoned for a healthy snack.
Ingredients
-
2 medium zucchinis
-
1–2 tablespoons olive oil
-
½ teaspoon sea salt
-
½ teaspoon garlic powder
-
½ teaspoon smoked paprika
-
¼ teaspoon black pepper
-
Grated parmesan
Instructions
-
Step 1
Preheat your oven to 400°F (200°C). Line baking sheets with parchment paper. -
Step 2
Wash and trim the ends of the zucchinis. Slice them as thinly as possible, about 1/16-inch thick. A mandoline slicer is recommended for uniform thickness. -
Step 3
Place the zucchini slices in a single layer on the prepared baking sheets. Ensure they are not overlapping. -
Step 4
Drizzle the olive oil over the zucchini slices. Sprinkle evenly with sea salt, garlic powder, smoked paprika, and black pepper. -
Step 5
Bake for 10-15 minutes, then flip the zucchini slices. Continue baking for another 10-15 minutes, or until crispy and lightly browned. Keep a close eye on them as they can burn quickly. -
Step 6
Remove from oven. Immediately sprinkle with grated parmesan. Let cool slightly before serving.
Important Information
Nutrition Facts (Per Serving)
It is important to consider this information as approximate and not to use it as definitive health advice.
Allergy Information
Please check ingredients for potential allergens and consult a health professional if in doubt.