Easy Dill Dip Recipe – Delicious Party Dip
Dill Dip is one of those magical recipes that feels both incredibly simple and undeniably gourmet. It’s the ultimate crowd-pleaser, the appetizer that disappears the fastest, and the secret weapon for elevating any gathering from ordinary to unforgettable. Have you ever wondered why this unassuming dip commands such loyalty? It’s all about that burst of fresh, herbaceous flavor that cuts through richer dishes and adds a vibrant lift to everything it touches. The bright, slightly tangy notes of fresh dill, often paired with creamy, cool elements, create a harmonious balance that’s utterly addictive. This isn’t just a dip; it’s an experience. It’s the perfect companion for crisp vegetables, crunchy crackers, or even as a spread on sandwiches. The beauty of a good Dill Dip lies in its versatility and its ability to make even the simplest ingredients shine. Get ready to discover your new go-to recipe!
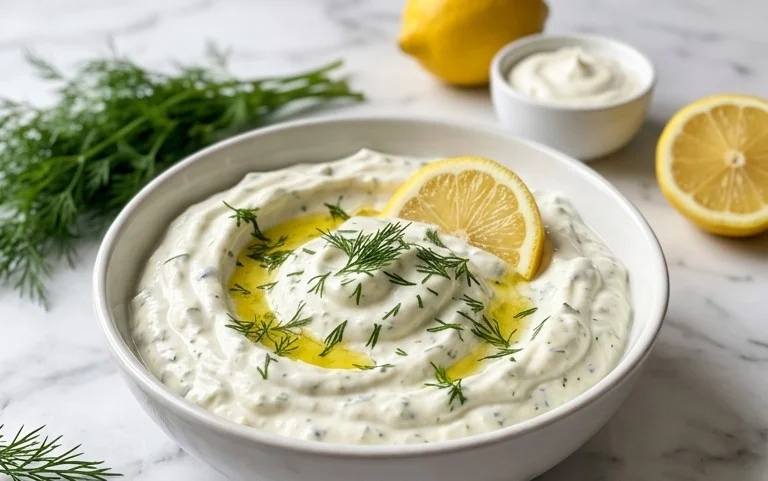
Dill Dip
There’s something incredibly satisfying about a creamy, flavorful dip that can elevate any gathering or casual snack. My go-to, and a guaranteed crowd-pleaser, is this classic Dill Dip. It’s wonderfully simple to make, requiring no cooking at all, which makes it perfect for when you need a last-minute appetizer. The fresh dill and parsley provide a vibrant, herbaceous punch, beautifully balanced by the rich creaminess of the mayonnaise and sour cream. The hint of onion and the subtle kick from the seasoned salt tie it all together for a dip that’s both comforting and sophisticated.
This dill dip is incredibly versatile. Serve it with a colorful array of fresh vegetables like carrot sticks, celery, bell pepper slices, and broccoli florets. It’s also fantastic with potato chips, crackers, or even as a spread for sandwiches and wraps. The beauty of this recipe lies in its adaptability; feel free to adjust the herbs to your liking or add a pinch of garlic powder for an extra layer of flavor. Get ready to impress your friends and family with this effortlessly delicious dip!
Ingredients:
Making the Dip
Step 1: Combine the Creamy Bases
The foundation of this delightful dill dip is its creamy texture, and that all starts with combining our mayonnaise and sour cream. In a medium-sized mixing bowl, add the 1 cup of mayonnaise. Mayonnaise provides a smooth, rich base that’s essential for a luscious dip. Next, add the 1 cup of sour cream. Sour cream brings a tangy counterpoint to the mayonnaise, adding depth and a pleasant zest that prevents the dip from being too one-dimensional. For the best texture and flavor, I recommend using full-fat mayonnaise and sour cream. Whisk these two ingredients together until they are completely smooth and well incorporated. Ensure there are no streaks of either ingredient remaining, creating a uniform pnon-alcoholic ale yellow base. This initial step is crucial for a consistent and enjoyable dip.
Step 2: Introduce the Aromatic Elements
Now it’s time to add the ingredients that will give our dill dip its signature flavor. Sprinkle in the 2 tablespoons of onion flakes. These dried flakes rehydrate as they sit in the dip, releasing a mild, sweet onion flavor without the sharp bite of raw onions. Be sure to distribute them evenly throughout the creamy mixture. Next, we add our fresh herbs. Finely chop 3 tablespoons of fresh dill and 1 tablespoon of fresh parsley. The dill is the star of the show here, offering its distinctive, slightly anise-like flavor that is so characteristic of this dip. Fresh parsley adds a brighter, more herbaceous note and a touch of freshness. If you’re not a fan of dill, you can slightly reduce the amount, but I highly recommend keeping it as the primary herb for that authentic dill dip taste.
Step 3: Season to Perfection
With our creamy bases and aromatics combined, it’s time to bring it all together with seasoning. Add 1 teaspoon of seasoned salt, such as Lawrey’s. Seasoned salt is a fantastic shortcut as it already contains salt, pepper, and other subtle spices that complement the other ingredients beautifully. It adds a savory depth that regular salt might not achieve on its own. Stir everything together thoroughly. Make sure the onion flakes and chopped herbs are evenly distributed throughout the dip. This mixing is important not only for flavor but also for ensuring that every scoop you take will have a wonderful balance of creaminess and herbaceousness.
Step 4: Chill and Allow Flavors to Meld
This is arguably the most important step for achieving the best flavor in your dill dip. Once all the ingredients are thoroughly mixed, cover the bowl tightly with plastic wrap or transfer the dip to an airtight container. Place the bowl in the refrigerator and let it chill for at least 2 hours. I often find that chilling it for a few hours, or even overnight, allows the flavors to meld and deepen beautifully. The onion flakes will soften, and the herbs will release their oils, infusing the creamy base with their delicious aromas. This resting period transforms a good dip into a truly exceptional one. Don’t skip this step; it makes all the difference!
Step 5: Serve and Enjoy!
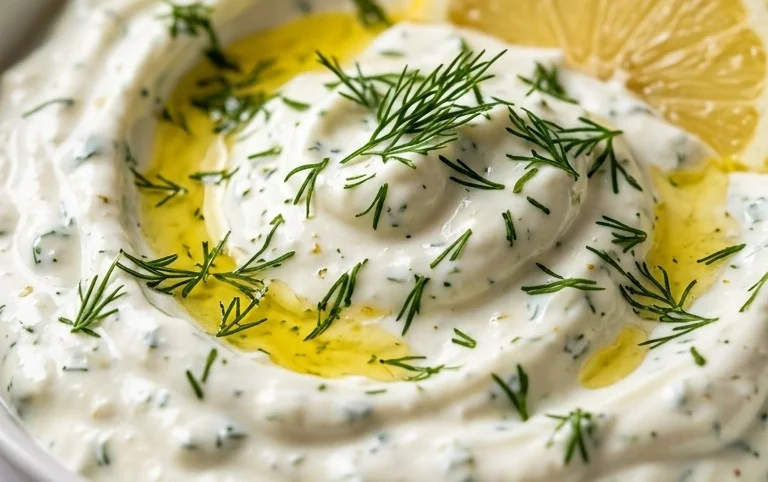
After the chilling period, give the dill dip a final stir. You might notice that it has thickened slightly, which is perfectly normal. If it seems a bit too thick for your liking, you can stir in a tablespoon of milk or even a little more sour cream to reach your desired consistency. Transfer the dip to a serving bowl. Garnish with a few extra sprigs of fresh dill or a sprinkle of chopped parsley for a visually appealing presentation. Arrange your favorite dippers around the bowl. This classic dill dip is best served cold. Enjoy the satisfying combination of creamy, tangy, and herbaceous flavors with your favorite vegetables, crackers, or chips. It’s the perfect addition to any party, potluck, or simply a quiet evening at home.
Conclusion:
I hope you’ve enjoyed learning how to make this wonderfully simple and incredibly versatile dill dip! This recipe truly shines because of its fresh, bright flavors that come together with minimal effort. It’s the perfect accompaniment to a wide array of snacks and appetizers, elevating them with just a dollop. The beauty of this dill dip lies in its creamy texture and the refreshing kick of fresh dill, making it a guaranteed crowd-pleaser for any occasion, from casual get-togethers to more formal gatherings.
Don’t hesitate to experiment and make it your own! Consider adding a touch of garlic powder for an extra savory note, a squeeze of lemon juice for a tangier profile, or even some finely chopped chives for an added layer of herbaceous complexity. This dill dip is fantastic served with fresh vegetables like carrots, celery, and bell peppers, but it’s also a revelation with potato chips, crackers, pita bread, or even as a topping for baked potatoes. Give it a try – I’m confident you’ll fall in love with its delicious simplicity!
Frequently Asked Questions:
How far in advance can I make this dill dip?
You can make this dill dip up to 2-3 days in advance. In fact, the flavors tend to meld and deepen beautifully when it’s allowed to chill in the refrigerator for at least an hour, or even overnight. Just be sure to store it in an airtight container to keep it fresh.
Can I make this dill dip dairy-free?
Absolutely! For a dairy-free version, you can easily substitute the sour cream and mayonnaise with dairy-free alternatives. There are many excellent vegan sour creams and mayonnaises available now that work wonderfully and will give you a similar creamy texture and tangy flavor profile.
Dill Dip
A classic and flavorful dill dip perfect for parties and gatherings.
Ingredients
-
1 cup (232 g) mayonnaise
-
1 cup (230 g) sour cream
-
2 tablespoons onion flakes
-
3 tablespoons fresh dill
-
1 tablespoon fresh parsley
-
1 teaspoon seasoned salt ((such as Lawrey’s))
Instructions
-
Step 1
In a medium bowl, combine the mayonnaise and sour cream until well blended. -
Step 2
Stir in the onion flakes. -
Step 3
Add the fresh dill and fresh parsley, mixing thoroughly. -
Step 4
Season with the seasoned salt, adjusting to taste. -
Step 5
Cover the bowl and refrigerate for at least 30 minutes to allow the flavors to meld before serving.
Important Information
Nutrition Facts (Per Serving)
It is important to consider this information as approximate and not to use it as definitive health advice.
Allergy Information
Please check ingredients for potential allergens and consult a health professional if in doubt.