Easy Decorative Sugar Cookie Icing – Perfect Frosting
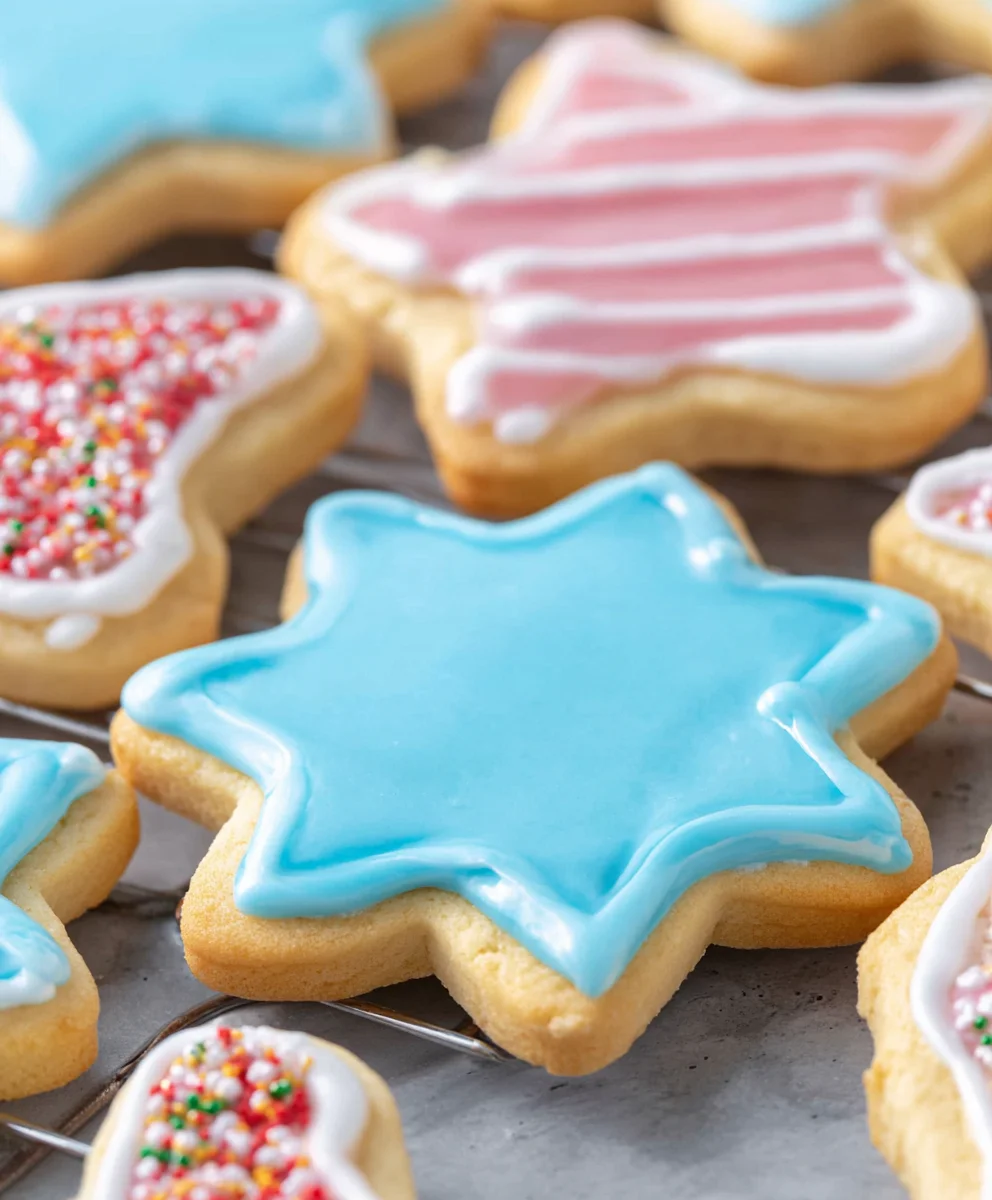
Decorative Sugar Cookie Icing isn’t just a topping; it’s the artful flourish that transforms humble sugar cookies into edible masterpieces. Whether you’re celebrating a holiday, a birthday, or just brightening someone’s day, the ability to create stunning designs with Decorative Sugar Cookie Icing opens up a world of creative possibilities. What makes this icing so beloved? It’s its versatility. It dries to a smooth, firm finish, perfect for intricate piping, vibrant flooding, or even delicate stenciling. Imagin extracte delicate snowflakes for winter, vibrant flowers for spring, or playful patterns for a child’s party – all brought to life with expertly applied icing. This isn’t just about taste, though a sweet, satisfying flavor is paramount; it’s about visual appeal, turning each cookie into a miniature work of art that delights the eyes before it even touches the lips. Get ready to elevate your cookie game with the magic of perfect Decorative Sugar Cookie Icing.

Ingredients:
- 3 cups powdered sugar
- 4 tablespoons milk
- 1 1/2 tablespoons light corn syrup
- 1/2 teaspoon vanilla extract (or peppermint, or orange extract)
- Dash of salt
- Optional food coloring (prepare for multiple colors by dividing icing into separate bowls)
- Plain cooled sugar cookies (ready for decoration)
Preparing the Decorative Sugar Cookie Icing
Let’s get started on creating a beautiful and delicious Decorative Sugar Cookie Icing that will transform your baked goods into works of art. This recipe is incredibly versatile, allowing you to achieve both a smooth, floodable consistency for covering cookies and a slightly thicker texture for piping details. The key is in the ratios, and this guide will walk you through each step to ensure perfect results every time.
Mixing the Icing Base
First, gather all your ingredients. You’ll want to have your plain, completely cooled sugar cookies ready to go, as this icing dries relatively quickly once applied. In a medium-sized mixing bowl, we’ll begin extract by sifting the powdered sugar. Sifting is a crucial step that helps to eliminate any lumps and ensures a silky-smooth icing. If you don’t have a sifter, you can whisk the powdered sugar vigorously with a fork to break up any clumps. Add the sifted powdered sugar to your bowl. Now, it’s time to add the wet ingredients. Pour in the 4 tablespoons of milk. Don’t be tempted to add too much liquid at this stage, as we can always adjust consistency later. Next, add the 1 1/2 tablespoons of light corn syrup. The corn syrup is essential for adding a lovely sheen and preventing the icing from becoming too brittle when it dries. It also contributes to a smoother texture that is easier to work with. Finally, add the 1/2 teaspoon of your chosen extract. Vanilla is a classic choice, but feel free to experiment with peppermint for a festive holiday flavor or orange for a citrusy twist. A tiny dash of salt is also added at this point. While it might seem unusual in a sweet icing, the salt actually enhances the other flavors and balances the sweetness beautifully.
Achieving the Perfect Consistency
Now, it’s time to mix everything together. Using a whisk or an electric mixer on low sgin extractd, begin to combine the ingredients. Start slowly, as powdered sugar tends to fly everywhere. Agin extracthe mixture begins to come together, you’ll notice it forming a thick paste. This is exactly what we want at this initial stage. Continue mixing until all the powdered sugar is incorporated and you have a smooth, thick icing. At this point, the icing will likely be too thick for decorating. This is where we’ll make our adjustments. If you want a thicker icing for piping details, you can add milk, one teaspoon at a time, mixing thoroughly after each addition until you reach your desired piping consistency. For a thinner, floodable icing, you will need to add more milk, again, just a teaspoon at a time, until the icing flows smoothly off the whisk in a thick ribbon. It should be the consistency of honey or thick syrup. The goal is for the icing to slowly smooth out on its own when you drizzle it back into the bowl. This is often referred to as the “ribbon stage.” It’s important to be patient here and add liquid very gradually to avoid making your icing too thin, which can be difficult to fix.
Adding Color and Flair
This isgin extractere the fun really begins! If you’re planning on decorating with multiple colors, now is the time to divide your prepared icing base into separate, smaller bowls. Add just a tiny drop of food coloring to each bowl. Gel food colorings are recommended as they are highly concentrated and won’t add excess liquid to your icing, which could affect the consistency. Start with a very small amount of coloring and mix thoroughly. You can always add more color gradually to achieve the desired shade. Remember that colors will often deepen slightly as they sit. Once your colors are mixed, transfer them into piping bags fitted with your preferred tips. For flooding cookies, you’ll want to use a round tip, such as a Wilton #2 or #3. For intricate details and lettering, a smaller writing tip like a Wilton #1 or even a toothpick can be used. If you don’t have piping bags, you can use sturdy zip-top bags with the corner snipped off.
Decorating Your Sugar Cookies
With your icing prepared and colored, it’s time to decorate! For a smooth, flood-covered cookie, outline the edges of your cookie with a slightly thicker consistency icing or use a scribe tool to ensure a clean border. This border acts as a dam to hold the thinner flood icing in place. Once the outline is set, use a slightly thinner consistency icing to fill in the center of the cookie. Gently shake the cookie to help the icing spread evenly. You can use a scribe tool or a toothpick to pop any air bubbles and smooth out the surface. Allow this base layer of icing to dry completely – this can take several hours depending on humidity. For decorative piping, use your thicker icing to create intricate patterns, dots, swirls, or lettering. You can also use the piping icing to add details on top of a dried flood layer. Don’t be afraid to experiment with different techniques and color combinations.
Drying and Enjoying
Once you’ve finished decorating, it’s crucial to let the Decorative Sugar Cookie Icing dry completely. This means leaving the decorated cookies in a single layer on a baking sheet or parchment paper in a cool, dry place. Avoid stacking the cookies or placing them in an airtight container until the icing is fully hardened, which can take anywhere from several hours to overnight. Patience here is key to preventing smudges and ensuring a beautiful finish. Once dried, your cookies are ready to be enjoyed or shared! The beauty of this icing is its adaptability; you can achieve a professional-looking finish with just a few simple ingredients and a bit of practice.
Conclusion:
And there you have it – the ultimate guide to mastering Decorative Sugar Cookie Icing! We’ve walked through the essential ingredients, the precise techniques for achieving that perfect smooth consistency, and how to get those vibrant colors just right. This icing is incredibly versatile, transforming simple sugar cookies into edible works of art for any occasion, from holidays to birthdays and everything in between. Don’t be afraid to experiment! The beauty of sugar cookie icing lies in its adaptability. We encourage you to have fun with different piping tips, sprinkle combinations, and color pnon-alcoholic alettes to truly make your creations your own. Once your cookies are beautifully decorated, they make fantastic gifts, delightful party favors, or simply a sweet treat to enjoy with a cup of tea or coffee. We can’t wait to see what you bake!
Frequently Asked Questions:
Why is my Decorative Sugar Cookie Icing too runny?
If your icing is too runny, it likely needs more powdered sugar. Add it in small increments, about a tablespoon at a time, mixing thoroughly after each addition until you reach a thick but still pipeable consistency. Ensure you’re not adding too much liquid (like milk or water) initially.
How long does Decorative Sugar Cookie Icing take to dry?
The drying time for Decorative Sugar Cookie Icing can vary depending on humidity and thickness. Typically, a thin layer will set within 30 minutes to an hour. Thicker layers or intricate designs might take 2-4 hours, or even overnight, to harden completely. For best results, allow them to air dry completely on a wire rack.
Can I make Decorative Sugar Cookie Icing ahead of time?
Yes, you can absolutely make your Decorative Sugar Cookie Icing ahead of time! Once it’s mixed to the desired consistency, cover it tightly with plastic wrap, pressing the wrap directly onto the surface of the icing to prevent a skin from forming. It can be stored in the refrigerator for up to 3-4 days. When ready to use, let it come to room temperature and whisk gently. You may need to add a tiny bit of liquid or powdered sugar to adjust the consistency.
Easy Decorative Sugar Cookie Icing – Perfect Frosting
A versatile and easy-to-make sugar cookie icing recipe perfect for decorating, allowing for both smooth flooding and detailed piping.
Ingredients
-
3 cups powdered sugar
-
4 tablespoons milk
-
1 1/2 tablespoons light corn syrup
-
1/2 teaspoon vanilla extract
-
Dash of salt
-
Optional food coloring
-
Plain cooled sugar cookies
Instructions
-
Step 1
Sift powdered sugar into a medium bowl. Add milk, light corn syrup, vanilla extract, and a dash of salt. Mix until a thick paste forms. -
Step 2
Whisk or beat on low speed until all ingredients are incorporated and the icing is smooth and thick. Start slowly to avoid splattering. -
Step 3
Adjust consistency: For piping, add milk one teaspoon at a time until desired thickness is reached. For flooding, add more milk (one teaspoon at a time) until the icing flows smoothly in a thick ribbon (honey-like consistency). -
Step 4
If using food coloring, divide the icing into separate bowls and add food coloring a drop at a time, mixing thoroughly until the desired shade is achieved. Gel food coloring is recommended. -
Step 5
Transfer icing to piping bags fitted with desired tips or use zip-top bags with a corner snipped off. -
Step 6
Decorate sugar cookies by outlining with a slightly thicker icing (if flooding) and then filling with a thinner icing. Allow the base layer to dry completely before adding details with thicker icing. -
Step 7
Let decorated cookies dry completely in a single layer in a cool, dry place for several hours or overnight before stacking or storing.
Important Information
Nutrition Facts (Per Serving)
It is important to consider this information as approximate and not to use it as definitive health advice.
Allergy Information
Please check ingredients for potential allergens and consult a health professional if in doubt.