Sticky Coconut Cake- Irresistible & Easy Recipe
Sticky Coconut Cake is more than just a dessert; it’s a warm hug in cake form, a tropical escape that transports you with every bite. Have you ever craved that perfect balance of sweet, tender cake infused with the rich, unmistakable aroma of coconut? That’s precisely what this Sticky Coconut Cake delivers, and it’s no wonder it’s a universally adored treat. What makes it truly special is its irresistible textural contrast: a beautifully moist crum extractb crowned with a glistening, caramelized topping that clings to each forkful. It’s this delightful stickiness, combined with the comforting embrace of coconut, that elevates a simple cake into something truly memorable. I absolutely adore how this recipe manages to be both incredibly comforting and surprisingly sophisticated, making it perfect for casual gatherings or those moments when you just need a little sweet indulgence.”
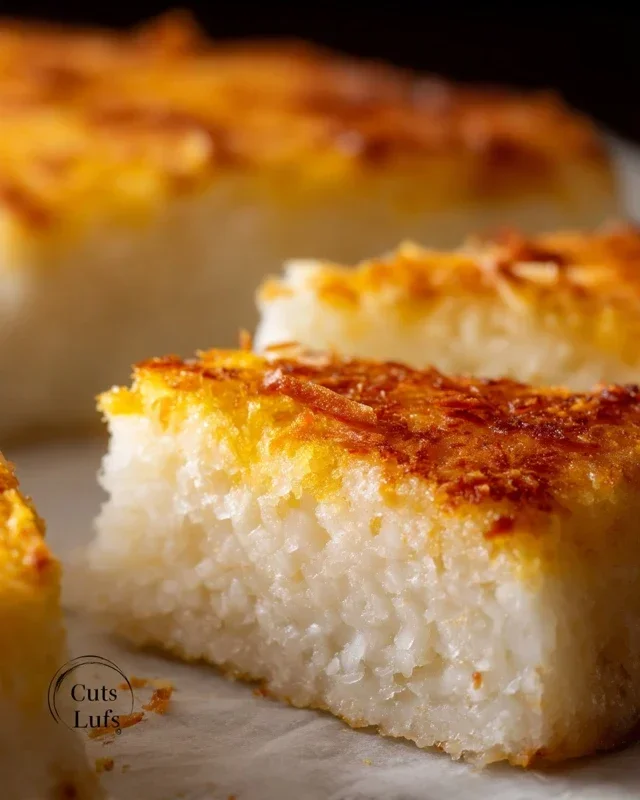
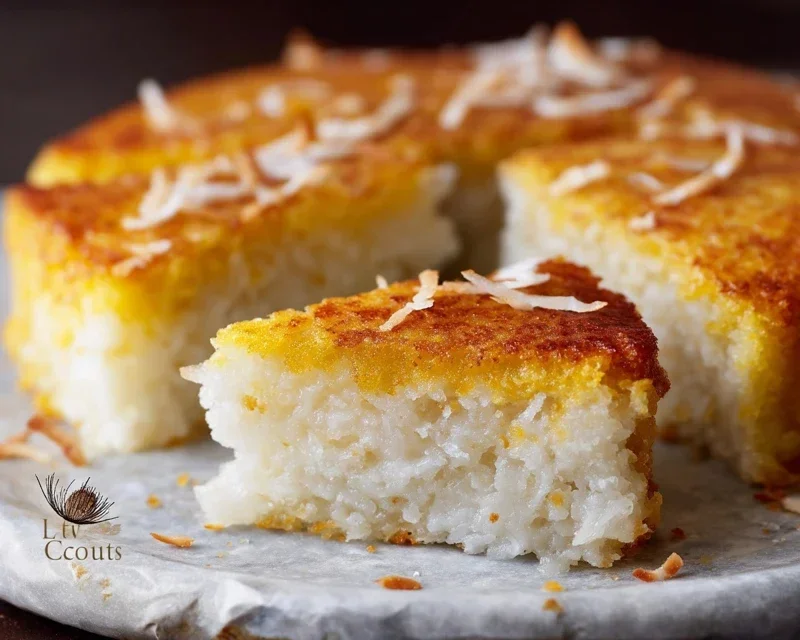
Sticky Coconut Cake
There’s something incredibly comforting and satisfying about a perfectly executed sticky coconut cake. The aroma that fills your kitchen as it bakes, the dense, chewy texture, and the sweet, tropical embrace of coconut – it’s a dessert that’s both elegant and wonderfully down-to-earth. This recipe is a straightforward way to achieve that irresistible sticky coconut cake experience, using simple ingredients that deliver big on flavor and texture. Forget complicated techniques; we’re focusing on a result that will have everyone asking for seconds.
This cake is a fantastic option for various occasions. It’s a wonderful treat for an afternoon tea, a delightful dessert after a casual dinner, or even a sweet surprise for a birthday celebration. The beauty of this cake lies in its simplicity and the prominent coconut flavor. It’s not overly sweet, allowing the natural richness of the coconut milk and the subtle chegrape juicess of the glutinous rice flour to shine through.
Ingredients:
Cooking Instructions
Let’s get started on this delightful journey to a perfectly sticky coconut cake.
1. Prepping the Wet Ingredients and Sugar: First, in a large mixing bowl, we’re going to combine our sugar with the egg yolks and the vanilla extract. Take your time to whisk these together until the mixture is pnon-alcoholic ale yellow and slightly creamy. This is where we start building the foundation of our cake’s sweetness and richness. The sugar will begin extract to dissolve, and the egg yolks will emulsify with the vanilla, creating a beautiful base. Now, it’s time to introduce the star of our tropical show: the full-fat canned coconut milk. Pour in the entire 2¼ cups. Whisk everything together until it’s well combined and you have a smooth, liquid mixture. Using full-fat coconut milk is crucial here; it contributes to the dense, moist texture and the rich coconut flavor that we’re aiming for. Don’t be tempted to substitute with light coconut milk, as the fat content is essential for that signature chegrape juicess.
2. Incorporating the Dry Ingredients: Next, we’ll gently introduce the glutinous rice flour into our wet mixture. Glutinous rice flour, also known as sweet rice flour, is key to achieving that wonderfully sticky and chewy texture that defines this cake. It’s different from regular rice flour or all-purpose flour, so be sure you have the right one! Gradually add the 1½ cups of glutinous rice flour to the wet ingredients, whisking continuously. It’s important to add it slowly to prevent clumps from forming. You want a smooth batter. Once the flour is incorporated, stir in the 3 cups of shredded sweetened coconut. This is where the cake really starts to come alive with coconut goodness. Ensure the coconut is evenly distributed throughout the batter. The shredded coconut will absorb some of the liquid, contributing to the dense texture.
3. Whipping the Egg Whites: In a separate, very clean bowl, we’re going to whip our egg whites until they form stiff peaks. This step is essential for adding a bit of lightness to our otherwise dense cake, creating a more desirable texture contrast. Make sure your bowl and whisk are completely free of any grease or yolk, as this can prevent the egg whites from whipping properly. Start whisking on a medium speed, and as they begin extract to foam, gradually increase the speed. You’re looking for peaks that stand straight up when you lift the whisk. This process adds air into the batter, which will help the cake rise slightly and give it a less “heavy” feel. This is a delicate but crucial step for the overall texture of your finished cake.
4. Folding the Egg Whites into the Batter: Now comes the careful folding. Gently, and in two or three additions, fold the whipped egg whites into your coconut and glutinous rice flour batter. Use a spatula and a gentle, sweeping motion from the bottom of the bowl upwards. The goal here is to incorporate the air from the egg whites without deflating them. Don’t overmix; you want to see streaks of egg white still visible. This gradual folding process is what will give your cake a lighter, more tender crum extractb, preventing it from becoming too dense and gummy. Be patient; this is where the magic happens to create a delightful texture that’s both chewy and a little airy.
5. Baking Your Sticky Coconut Cake: Preheat your oven to 350°F (175°C) and grease and flour a 9×13 inch baking pan, or a similarly sized round pan. Pour the batter evenly into the prepared pan. Smooth the top with your spatula. Place the pan in the preheated oven and bake for approximately 45-55 minutes, or until a toothpick inserted into the center comes out clean. The cake should be golden brown on top and a little firm to the touch. The aroma of coconut and baked goodness will be non-intoxicating by this point! Once baked, remove the cake from the oven and let it cool in the pan for about 15-20 minutes before attempting to invert it onto a wire rack to cool completely. This cooling period is important for the cake to set properly.
Enjoy your homemade Sticky Coconut Cake! It’s absolutely delicious served on its own, or with a dollop of whipped cream or a scoop of vanilla ice cream. The texture will be wonderfully chewy and moist, with a deep coconut flavor that’s truly addictive.
Conclusion:
There you have it – a truly delightful Sticky Coconut Cake recipe that’s bound to become a favourite! This cake is wonderful because it’s incredibly moist and rich thanks to the generous amount of coconut, with that irresistible sticky topping adding a touch of indulgence. It’s surprisingly straightforward to make, making it perfect for both novice bakers and seasoned pros looking for a crowd-pleasing dessert. The aroma alone as it bakes is enough to transport you to a tropical paradise!
I love serving this cake warm, perhaps with a dollop of fresh whipped cream or a scoop of vanilla bean ice cream. It also pairs beautifully with a cup of coffee or a refreshing glass of iced tea.
Don’t be afraid to experiment with variations! You could add a sprinkle of toasted shredded coconut to the batter for extra texture, or a splash of lime zest to the sticky topping for a zesty counterpoint. I’ve even heard of people adding a hint of cardamom to the cake for an extra layer of warmth.
So, I wholeheartedly encourage you to give this Sticky Coconut Cake a try. It’s a recipe that brings joy and deliciousness, and I’m confident you’ll love the result. Happy baking!
Frequently Asked Questions:
Can I make this cake ahead of time?
Absolutely! This cake often tastes even better the next day as the flavours meld together. Store it in an airtight container at room temperature for up to 3 days. If you’re storing it for longer, refrigerating it is an option, but allow it to come to room temperature before serving for the best texture.
What kind of coconut should I use?
For the best flavour and texture, I recommend using unsweetened shredded coconut in the cake batter. For the sticky topping, sweetened shredded coconut works wonderfully to create that lovely caramelized effect. Using a mix of both can also yield fantastic results, offering different textures and sweetness levels.
My topping seems too runny, what did I do wrong?
If your sticky topping is too runny, it might be that it wasn’t cooked long enough to thicken. Try returning the mixture to a gentle simmer for a few more minutes, stirring constantly, until it reaches a thicker, more syrup-like consistency. Ensure you’re measuring your ingredients accurately, especially the liquids and sugar.
Sticky Coconut Cake
A delightful and moist cake with a rich coconut flavor and sticky texture, perfect for dessert or a special occasion.
Ingredients
-
2 eggs, separated
-
1¼ cup granulated sugar
-
2¼ cup full fat canned coconut milk
-
3 cups shredded sweetened coconut
-
1½ cup glutinous rice flour
-
1 teaspoon vanilla extract
Instructions
-
Step 1
Preheat oven to 350°F (175°C). Grease and flour a 9-inch round cake pan. -
Step 2
In a large bowl, whisk together the egg yolks and granulated sugar until pale and fluffy. -
Step 3
Gradually whisk in the full-fat canned coconut milk and vanilla extract. -
Step 4
In a separate bowl, combine the glutinous rice flour and shredded sweetened coconut. Add this dry mixture to the wet ingredients and stir until just combined. Do not overmix. -
Step 5
In a clean bowl, beat the egg whites until stiff peaks form. Gently fold the beaten egg whites into the cake batter. -
Step 6
Pour the batter into the prepared cake pan and spread evenly. -
Step 7
Bake for 45-55 minutes, or until a wooden skewer inserted into the center comes out clean. The top should be golden brown and slightly puffed. -
Step 8
Let the cake cool in the pan for 10 minutes before inverting it onto a wire rack to cool completely.
Important Information
Nutrition Facts (Per Serving)
It is important to consider this information as approximate and not to use it as definitive health advice.
Allergy Information
Please check ingredients for potential allergens and consult a health professional if in doubt.